The order page
The order's details, changing the status, the payment, the products and the artwork, notes and history.
Updated:
An order's page opens from the order list (the order number or the arrow at the right of the row), from the Dashboard (Details) or from the Production queue (Open the order). This is where an order is actually worked on: here you check and approve the artwork, change the status, record the payment, choose the delivery and leave notes for your colleagues. Everything sits on a single page, split into a main column (the products) and a side column (money, customer, delivery).
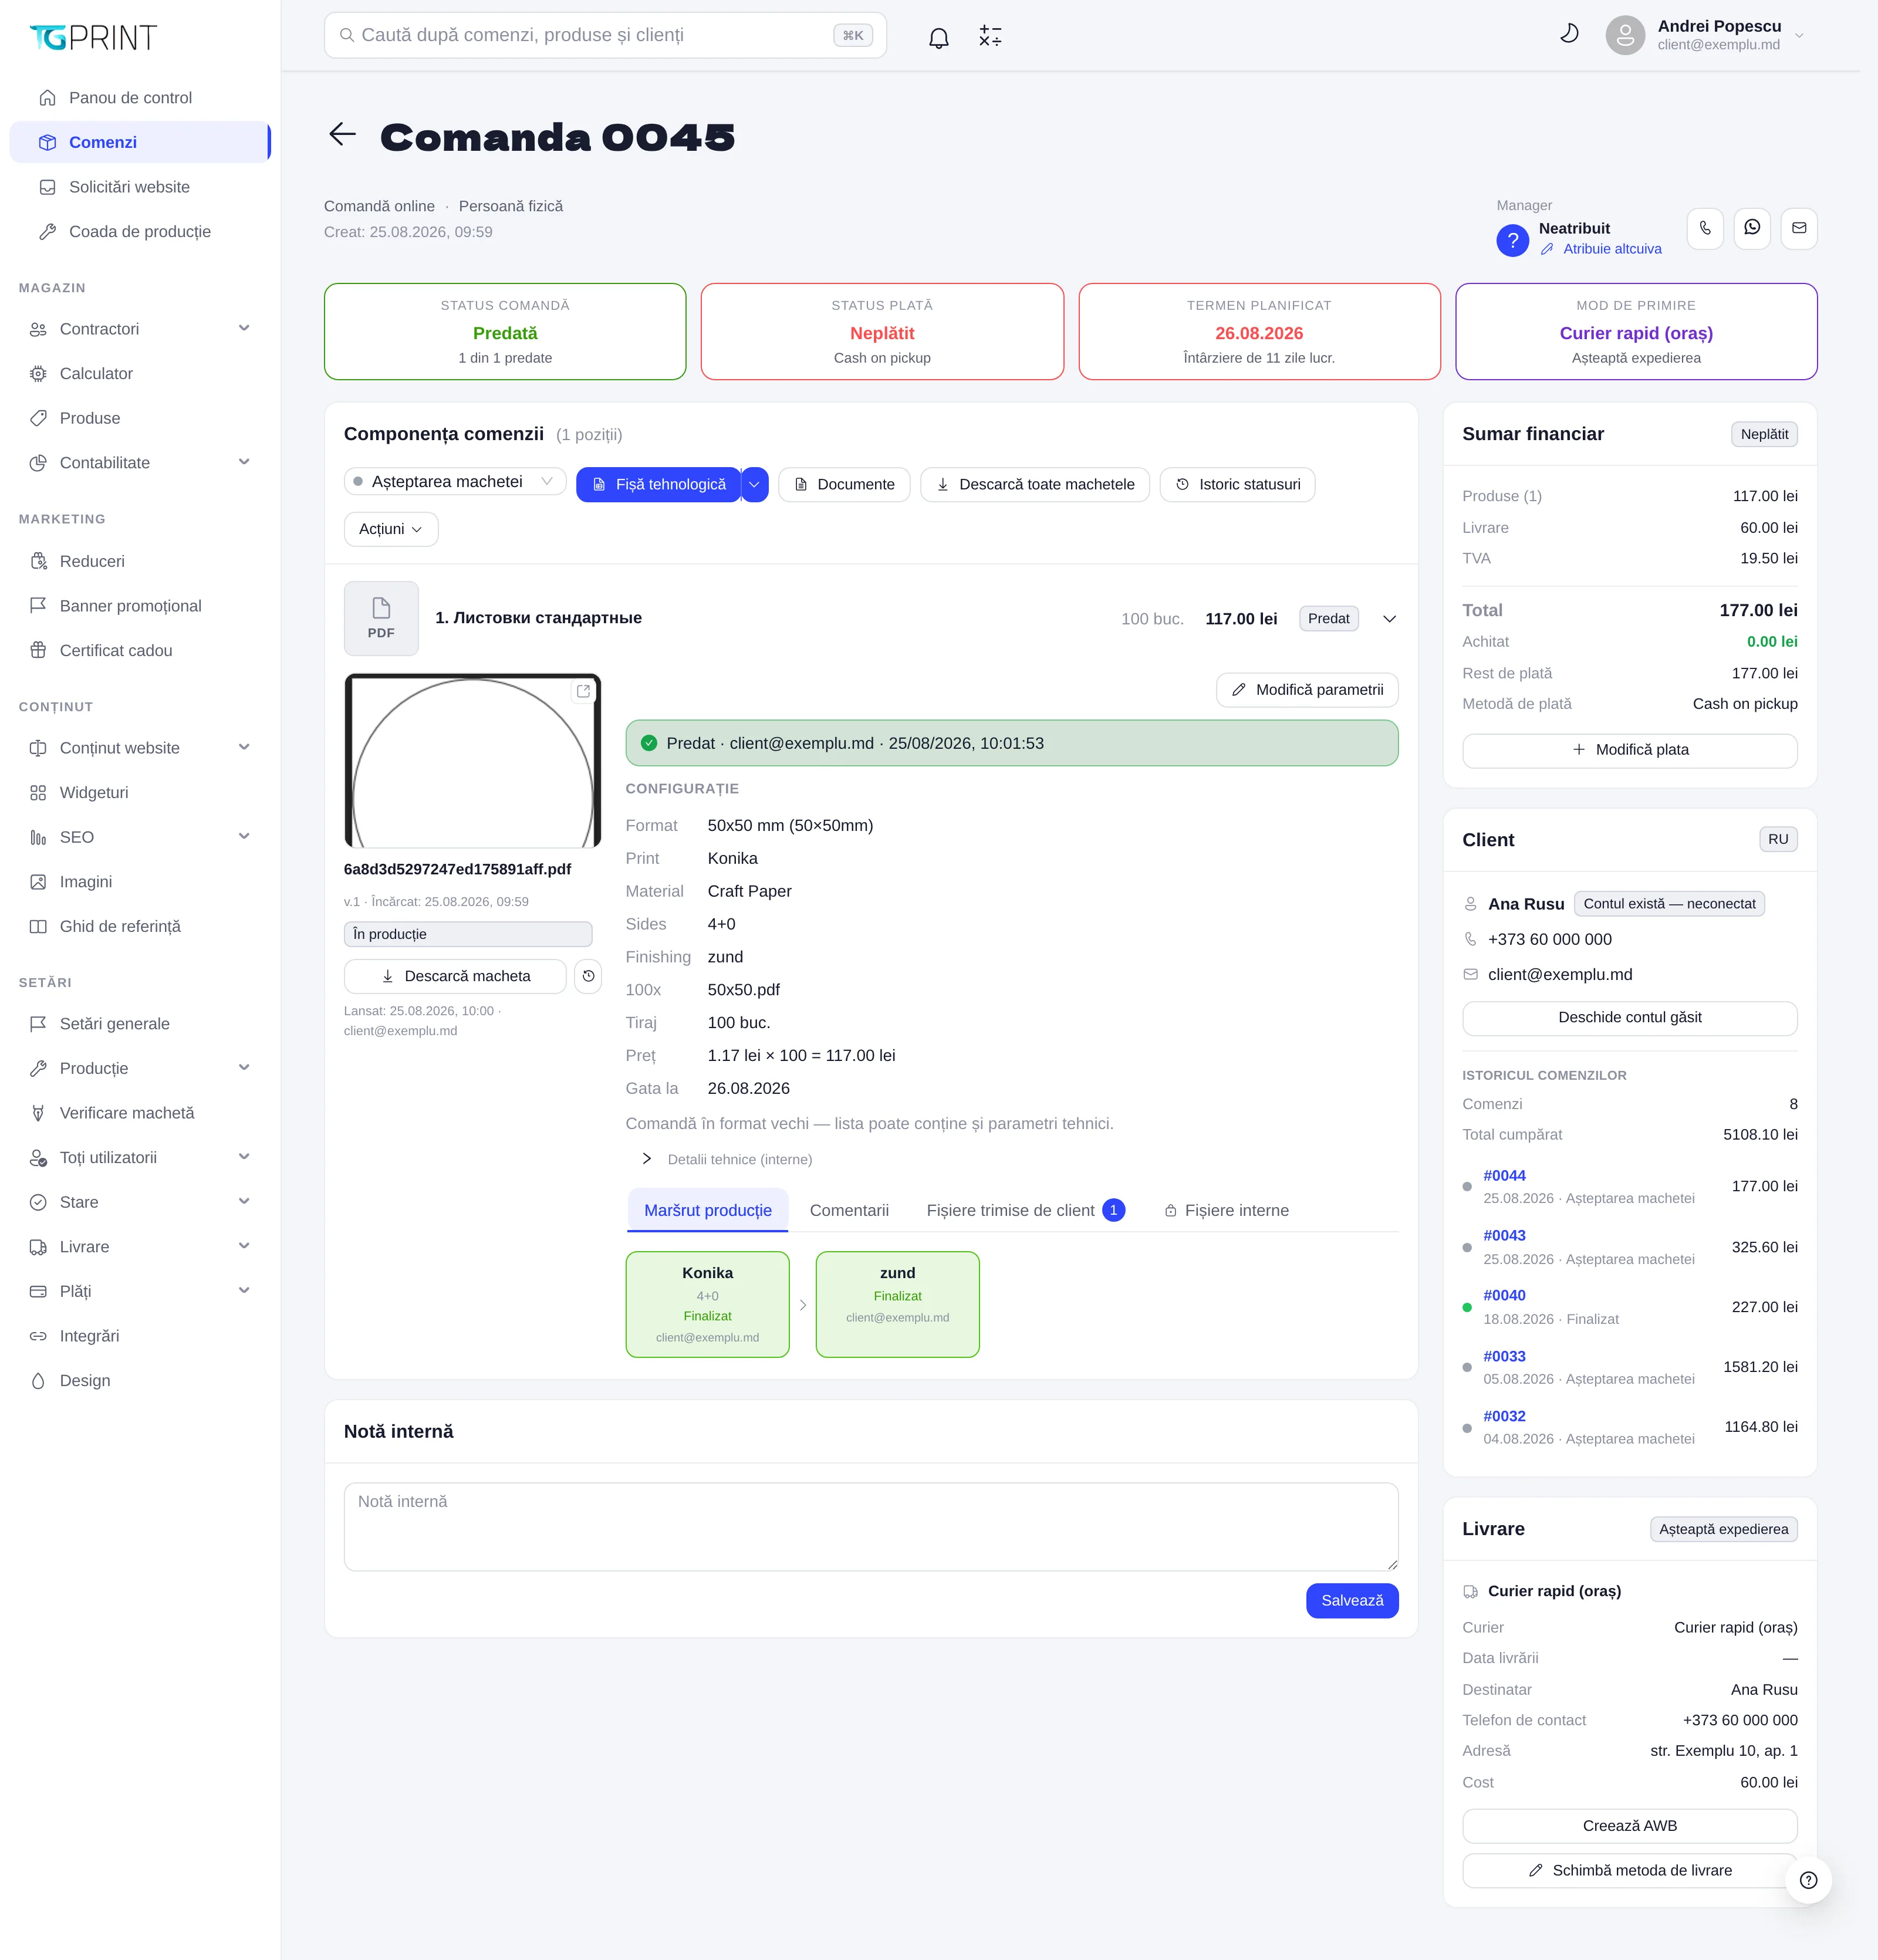
The header and the four cards
Under the title (Order 0045) you see where the order came from — Online order, Created by a manager or From a website request (with the request number) —, the customer type (Individual / Company) and the creation date. On the right is the Manager in charge: Unassigned until somebody picks it up; Assign someone else picks a colleague from the list. The three icons next to the manager are the quick contact with the customer: Call the client, Open WhatsApp, Send an email.
The four cards sum up the order at a glance:
- Order status — the current status and how many lines have reached it (1 of 1 handed over). The statuses are the ones from Settings → Status → Orders.
- Payment status — Unpaid, Payment received or partial, plus the method the customer chose (for example Cash on pickup).
- Planned readiness — the date by which the order has to be ready, computed from the chosen production timeframe and the production calendar; below it, N working days left, Due today or N working days overdue, in red.
- Receipt method — Self-pickup or By courier, with the specific method and the shipment status (Awaiting shipment, then the AWB number).
Order contents
The Order contents block lists the lines (the products) of the order. Above them sit the order's status selector and a row of actions that apply to the whole order:
- Tech card — the job ticket for the workshop (the product, the parameters, the materials, the operations), the same one the Production queue opens; the arrow next to the button chooses between a preview and a PDF file.
- Documents — the order's paperwork: the invoice, the delivery note and the completion certificate, each as a preview or a PDF, on the issuing company's details from Settings → Payments → For Legal Entities.
- Download all artwork — an archive with the files of every line.
- Status history — who changed the status and when, including the automatic changes.
- Actions — the remaining, rarer operations on the order (cancellation, deletion).
Every line has its own status (Awaiting artwork, Handed over…), its quantity and its value, and unfolded it shows:
- Artwork — the file's thumbnail, its name, its version (v.1), when and by whom it was uploaded, and the review status: Artwork under review, Artwork accepted, Needs correction or In production. The Accept artwork / Reject artwork buttons decide; a rejection requires a reason, which goes into the email sent to the customer. Replace file uploads a new version (the old one stays in the Artwork archive), and Download artwork takes the current file. A product configured without artwork shows Artwork not required — files for internal use go in the Internal files tab.
- Configuration — the parameters chosen by the customer: Format, Print (the machine), Material, Sides, Finishing, Run, Price (unit price × quantity) and Ready by. Change parameters opens the product's calculator with the current values, so you can correct the order after a conversation with the customer; Technical details (internal) unfolds the sheet layout, the materials with their quantities and the cost breakdown.
- The tabs at the bottom: Production route (the operations in the order of the flow — Konika 4+0, zund —, each with its own status and whoever completed it), Comments (the message exchange on that line), Files sent by the client (the artwork and the extra files, with their counter) and Internal files (files for the workshop, invisible to the customer).
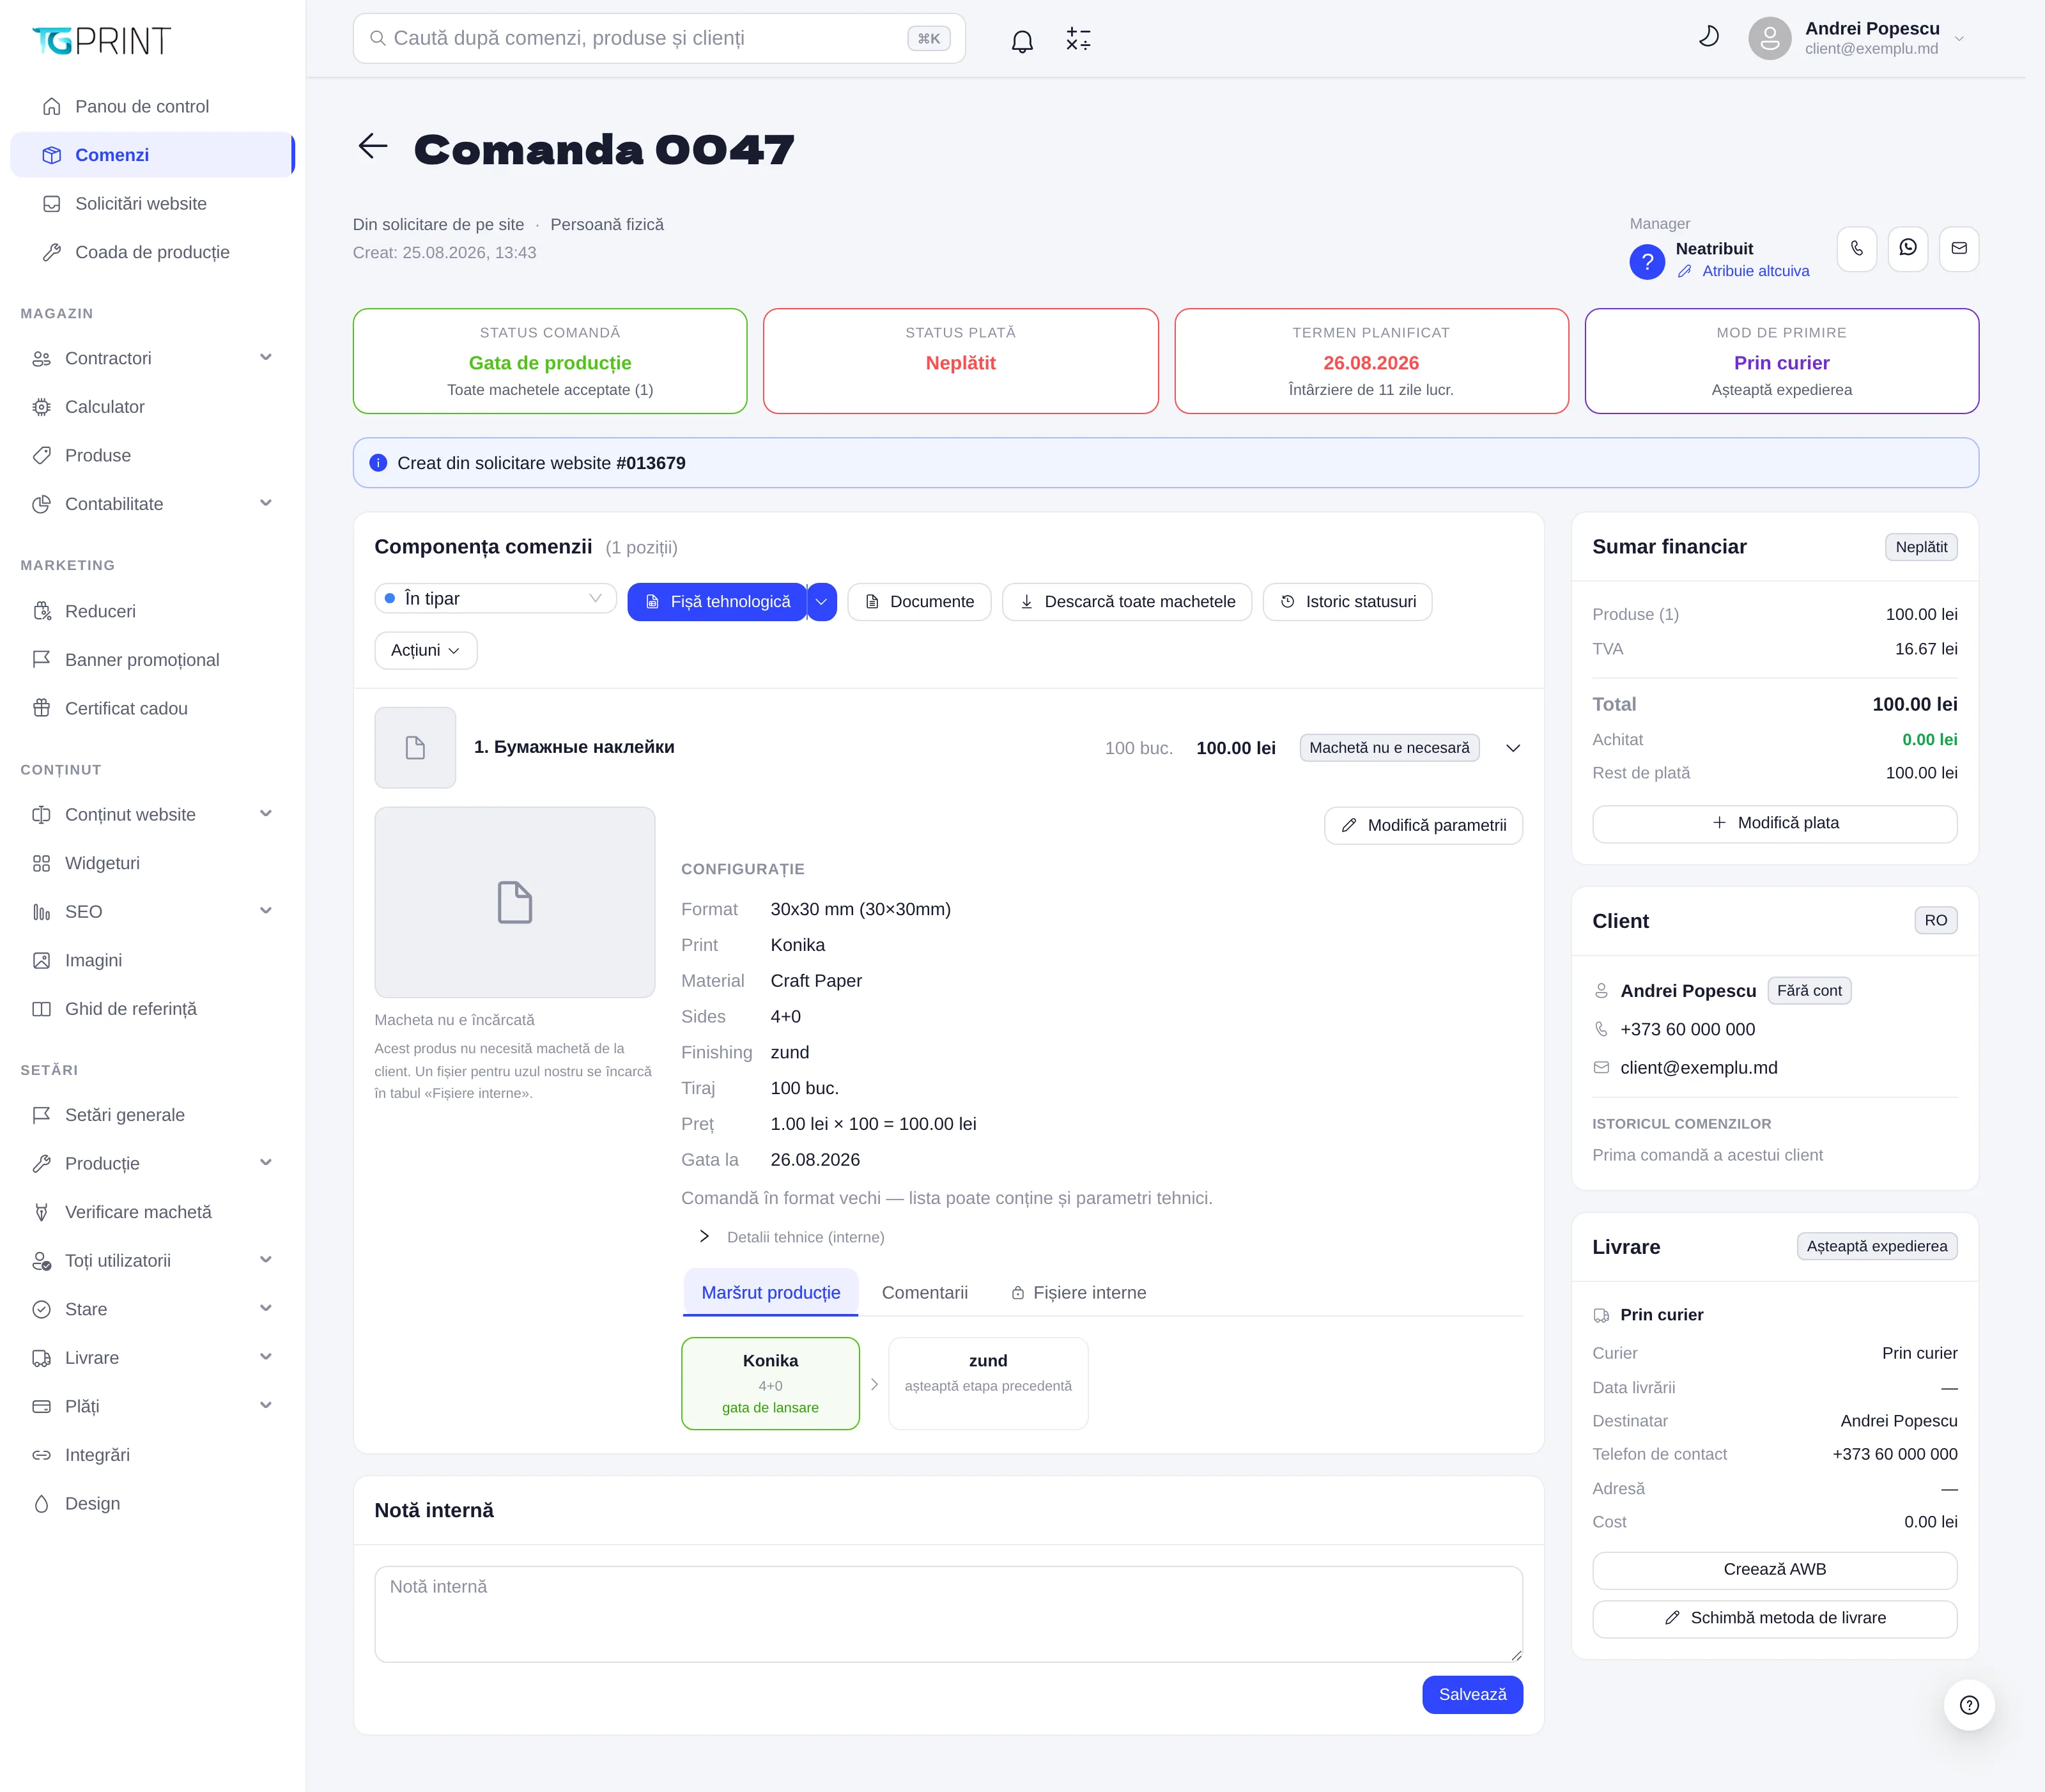
Note. The order status and the artwork status are different things. The order can be Ready for production only when all the artwork is accepted (the card at the top says so explicitly); if you enabled the automatic map in Settings → Status → Orders, accepting the last piece of artwork moves the order on by itself. See Statuses and rules.
Internal note
The Internal note field below the lines is for the team: observations about the customer, agreements made over the phone, warnings for production. The customer never sees it. Click Save once you have written it.
Financial summary
The right-hand column starts with the Financial summary: Products, Additional services, Delivery, Discount, Bonuses, VAT, Total, then Paid and Due, with the Payment method that was chosen. Edit payment opens the payments window, where you record an amount received (in full or in part) or correct it; the payment status on the card updates, and if the bonus programme is active, the customer's cashback is granted when the order is marked as paid. See General settings.
Client
The Client card shows the customer's name, phone, email and language of communication. If the order was placed as a guest but the email matches an existing account, the card says Account exists — not linked and offers Open the matching account; for a linked account you get Open client profile. Under the contact details is the Order history: the number of orders, the Lifetime total and the latest orders with their status and value — useful for seeing at a glance whether you are talking to a new customer or a loyal one. See Customers, organizations and groups.
Delivery
The Delivery card shows the Courier (the chosen method), the Delivery date, the Recipient, the Contact phone, the Address and the Cost; for self-pickup, the Pickup point and the Planned pickup date.
- Create AWB generates the shipment with the integrated courier (FAN Courier, Nova Poshta, CDEK — depending on the active integrations) and then shows the tracking number in AWB & tracking, from where you download the label or cancel the shipment.
- Change delivery method opens a window with the City, the Delivery method and the Delivery cost, negotiated (leave it empty to keep the computed cost); before saving you see the Current delivery cost, the New cost and the New order total. If a shipment already exists, you are warned to cancel it first.
Note. If Self-pickup is disabled in Settings → Integrations, pickup methods are not offered when you change the delivery, even if there are active branches. See Delivery and Integrations.