Pages
The content pages of the site (CMS): creating them, their URL, their content and publishing.
Updated:
Pages are the content pages of the public site — the home page, "About us", the legal policies, a campaign page. Every page has a URL, its SEO data and content made of blocks: widgets placed one below the other, in the order you choose. You manage them from Content → Website Content → Pages.
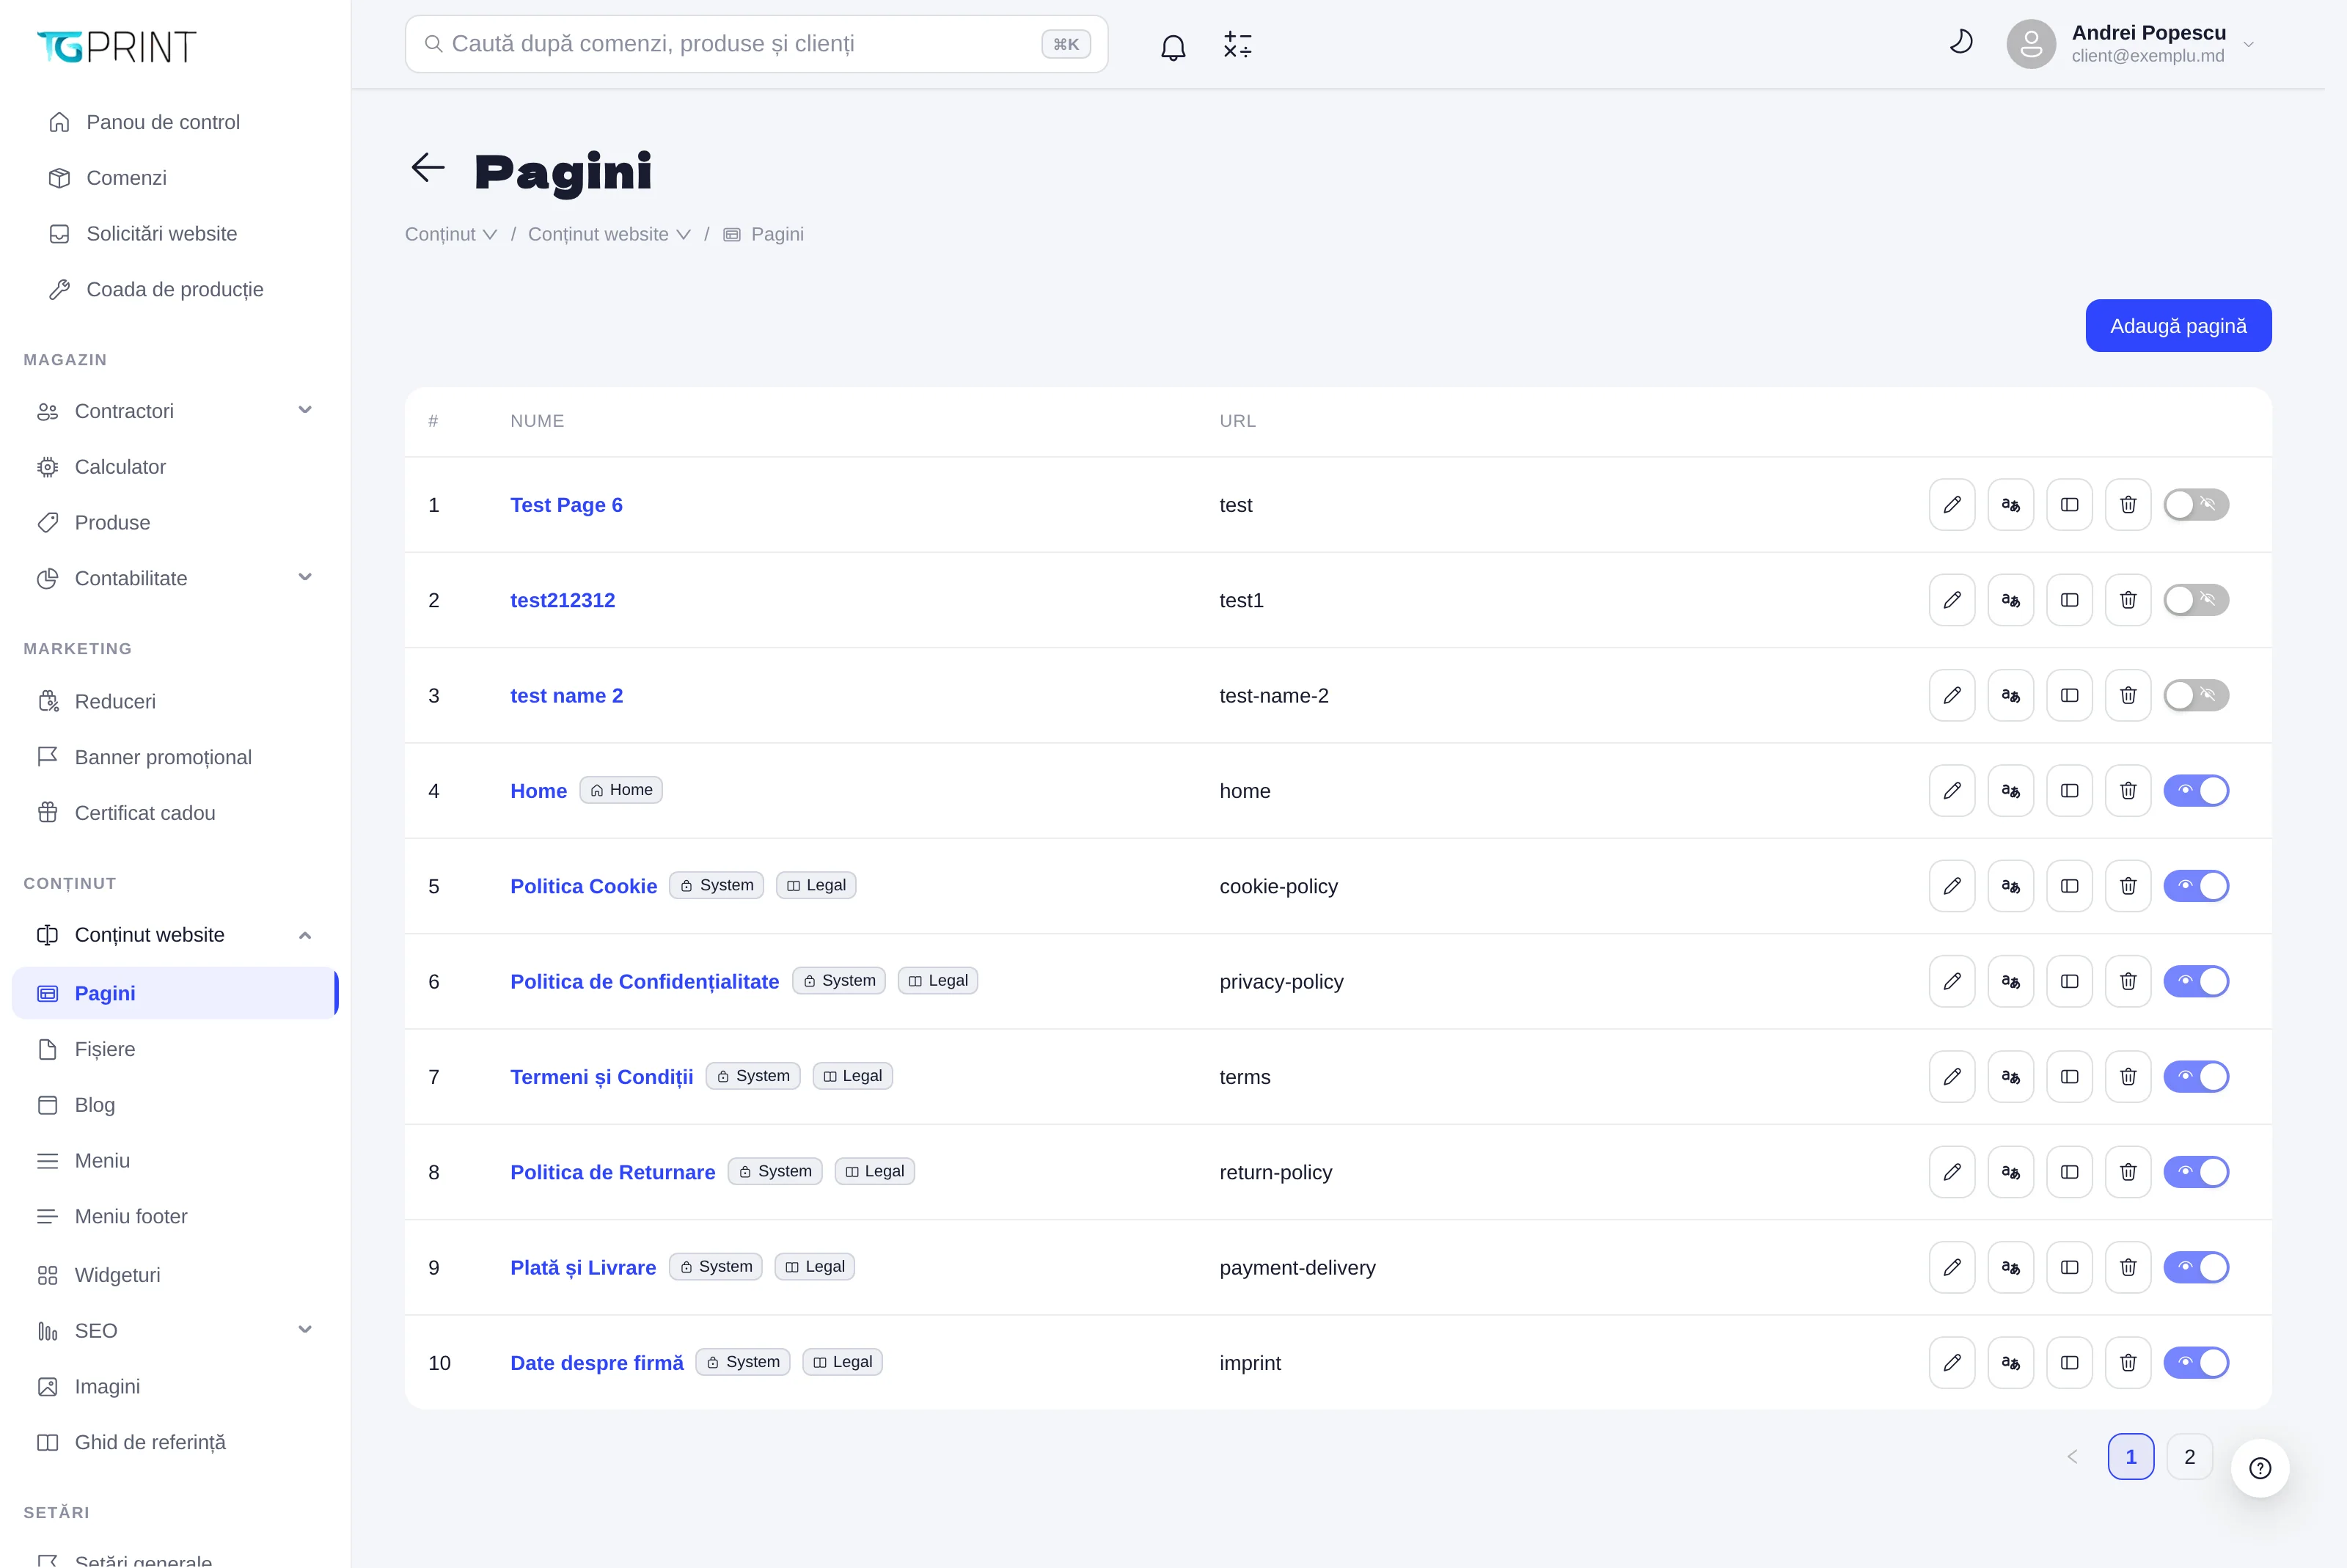
The list of pages
The table has the columns Name and URL. Labels can appear next to the name: Home — the home page of the site, served at the root address; System — a page created by the platform (the legal policies), which cannot be deleted, hidden or moved to another URL; Legal — a page of the legal type (see Type below). The buttons on the right of each row:
- Edit (the pencil) — opens the page in the editor; the name of the page does the same.
- Translations — opens the Translations window, with one tab per site language (Română, English, Русский) and the fields Name, Title, Short Description, Keywords. Click Save translations. A language left empty uses the main values of the page.
- View — opens the public page in a new tab.
- Delete — deletes the page after the "Are you sure you want to delete the page …?" confirmation. On Home and System pages the button is locked.
- The eye toggle — publishes or hides the page. A hidden page no longer opens on the site (it answers as a non-existent page), but it stays in the list and can still be edited. Home and System pages are always visible.
When the list is empty, the table shows No data; you create the first page with Add Page.
Add a page
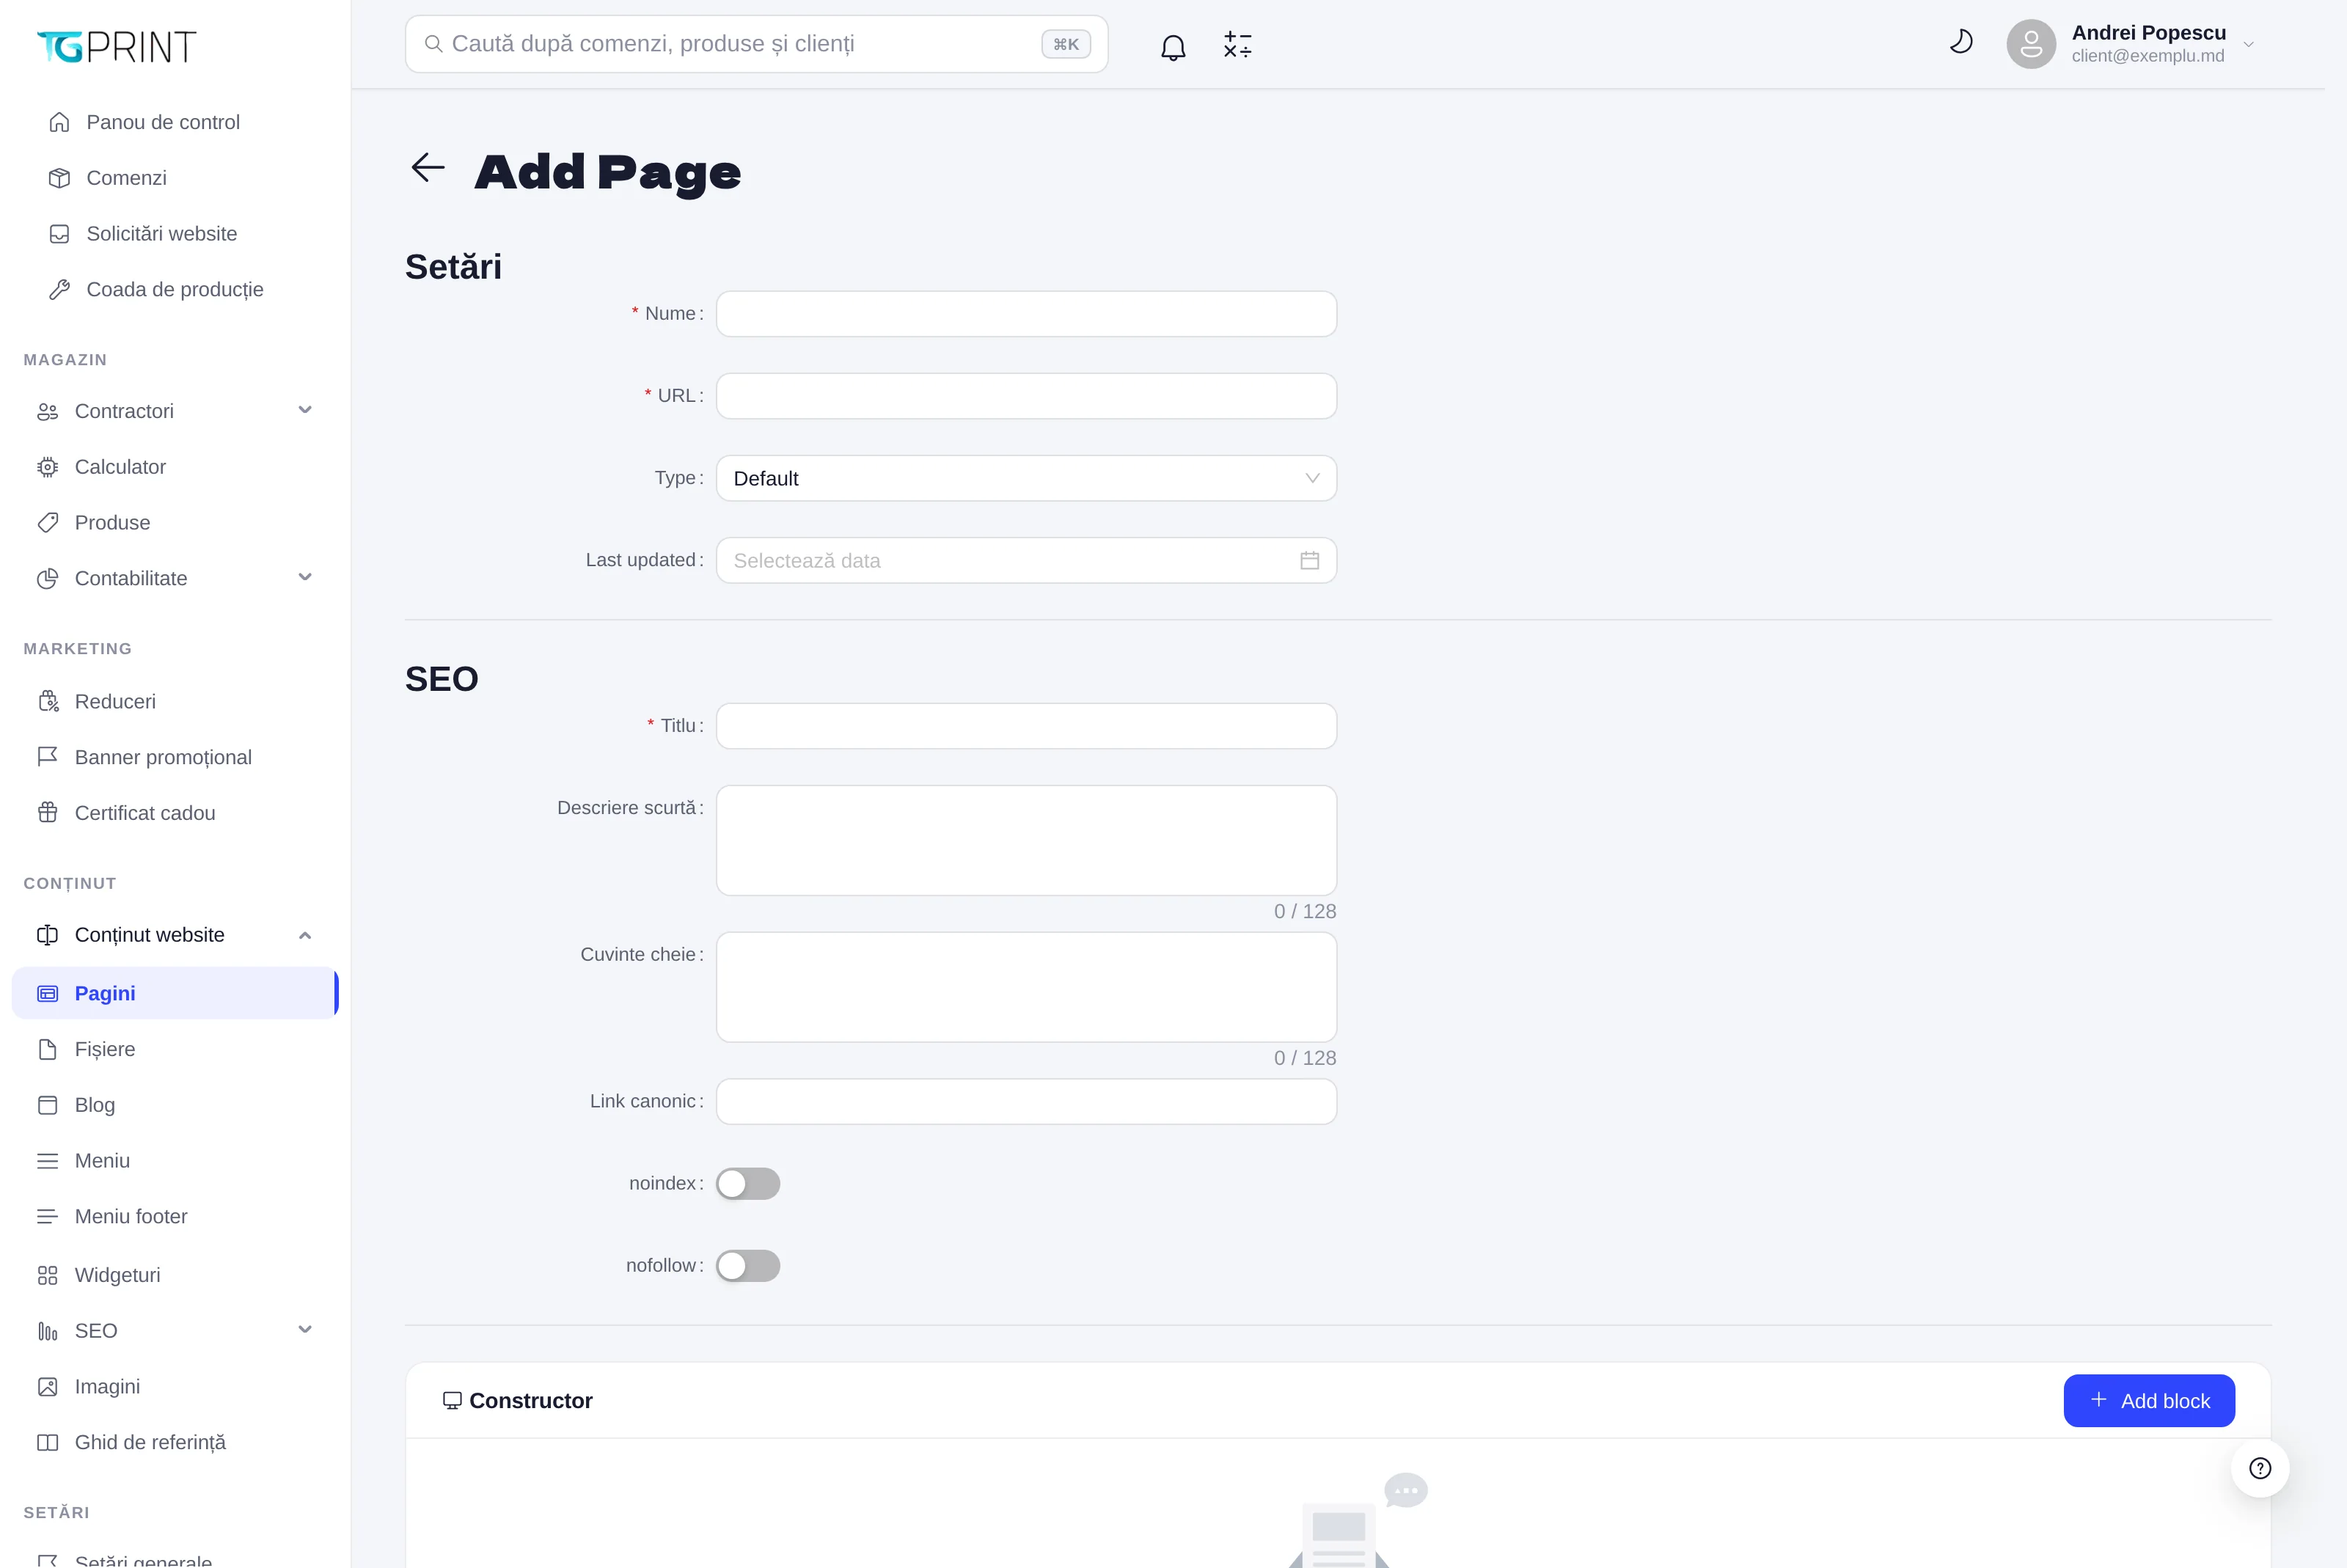
- Click Add Page. The Add Page screen opens.
- Under Settings, fill in Name (the name of the page, shown in the panel) and URL — the address segment: lowercase letters, digits, hyphens and slashes only, unique within the store. The page will be published at
/page/<URL>. - Type — Default for an ordinary page; Legal / policy for policies and terms: the page gets the look of a legal document, with a side table of contents and the date of the last update. Last updated is the date shown on Legal / policy pages; on the others it is not displayed.
- Under SEO, fill in Title (required; the SEO title of the page), Short Description and Keywords (comma-separated; max. 128 characters each), Canonical Link, and the noindex / nofollow toggles if you do not want the page to be indexed, or its links followed, by search engines.
- Under Constructor, add the blocks of the page with Add block (see below). You can also save a page without any blocks and come back later.
- Click Save. The page is published immediately and appears in the list.
The blocks of a page
Add block opens the Add a block window: first you choose the Widget type — the kind of block (product catalog, FAQ, gallery, contact form…), each with the number of templates already saved under Widgets. Then, for the chosen type, you have three options:
- Link — a link to an existing widget: the page shows the global widget, and any change to it is visible on every page that uses it.
- Copy — a copy of the widget, saved only on this page; the original widget can be changed later without affecting the page.
- Create blank block — a new block, filled in from scratch. The Create new block window opens, with Block name (an internal label), Device type, Active, the fields of the type, Appearance and SEO; Add to page adds it to the list.
Under Constructor, the blocks appear one below the other, numbered, with the label Template (a global widget), Inline (a block that belongs to this page) or Legacy. Drag the handle on the left to change the order ("Drag to Change Order"). The pencil opens the block for editing — on a Template block, the This widget is global warning appears and the button becomes Save global widget, because the change applies to every page. Delete moves the block into the Deleted widgets list, from where you can take it back with Restore until you save; on Save the deleted blocks are gone for good.
Editing an existing page
The editor of a saved page has, at the top, the collapsible Page settings — meta & SEO section, with the same fields as on creation, and below it two columns: Constructor on the left and Live preview on the right — a preview of the page that updates as you add, move or edit blocks, with a light/dark toggle and preset screen widths (375, 768, 1280, 1700 px). The View Product On Website button opens the public page in a new tab.
- Save applies every change to the site immediately — there is no draft stage.
- Reset to the saved version discards the unsaved changes (text, blocks added or deleted), after confirmation.
Note. On System pages, the URL and Type fields are locked and the page cannot be hidden; the content and the SEO data are edited as usual.
For the menu in which the pages appear, see The menu and the footer; for redirects and the sitemap, see SEO.