The order list
The indicators at the top, the status tabs, the filters, the table columns and the CSV export.
Updated:
Orders (the second entry in the menu) is the register of every order in the store: those placed by customers on the website, those created from the panel and those converted from website requests. From here you open an order, change its status straight from the table, filter by manager or by payment and export the list to CSV. The details of an order — artwork, payments, delivery — are managed on the order page.
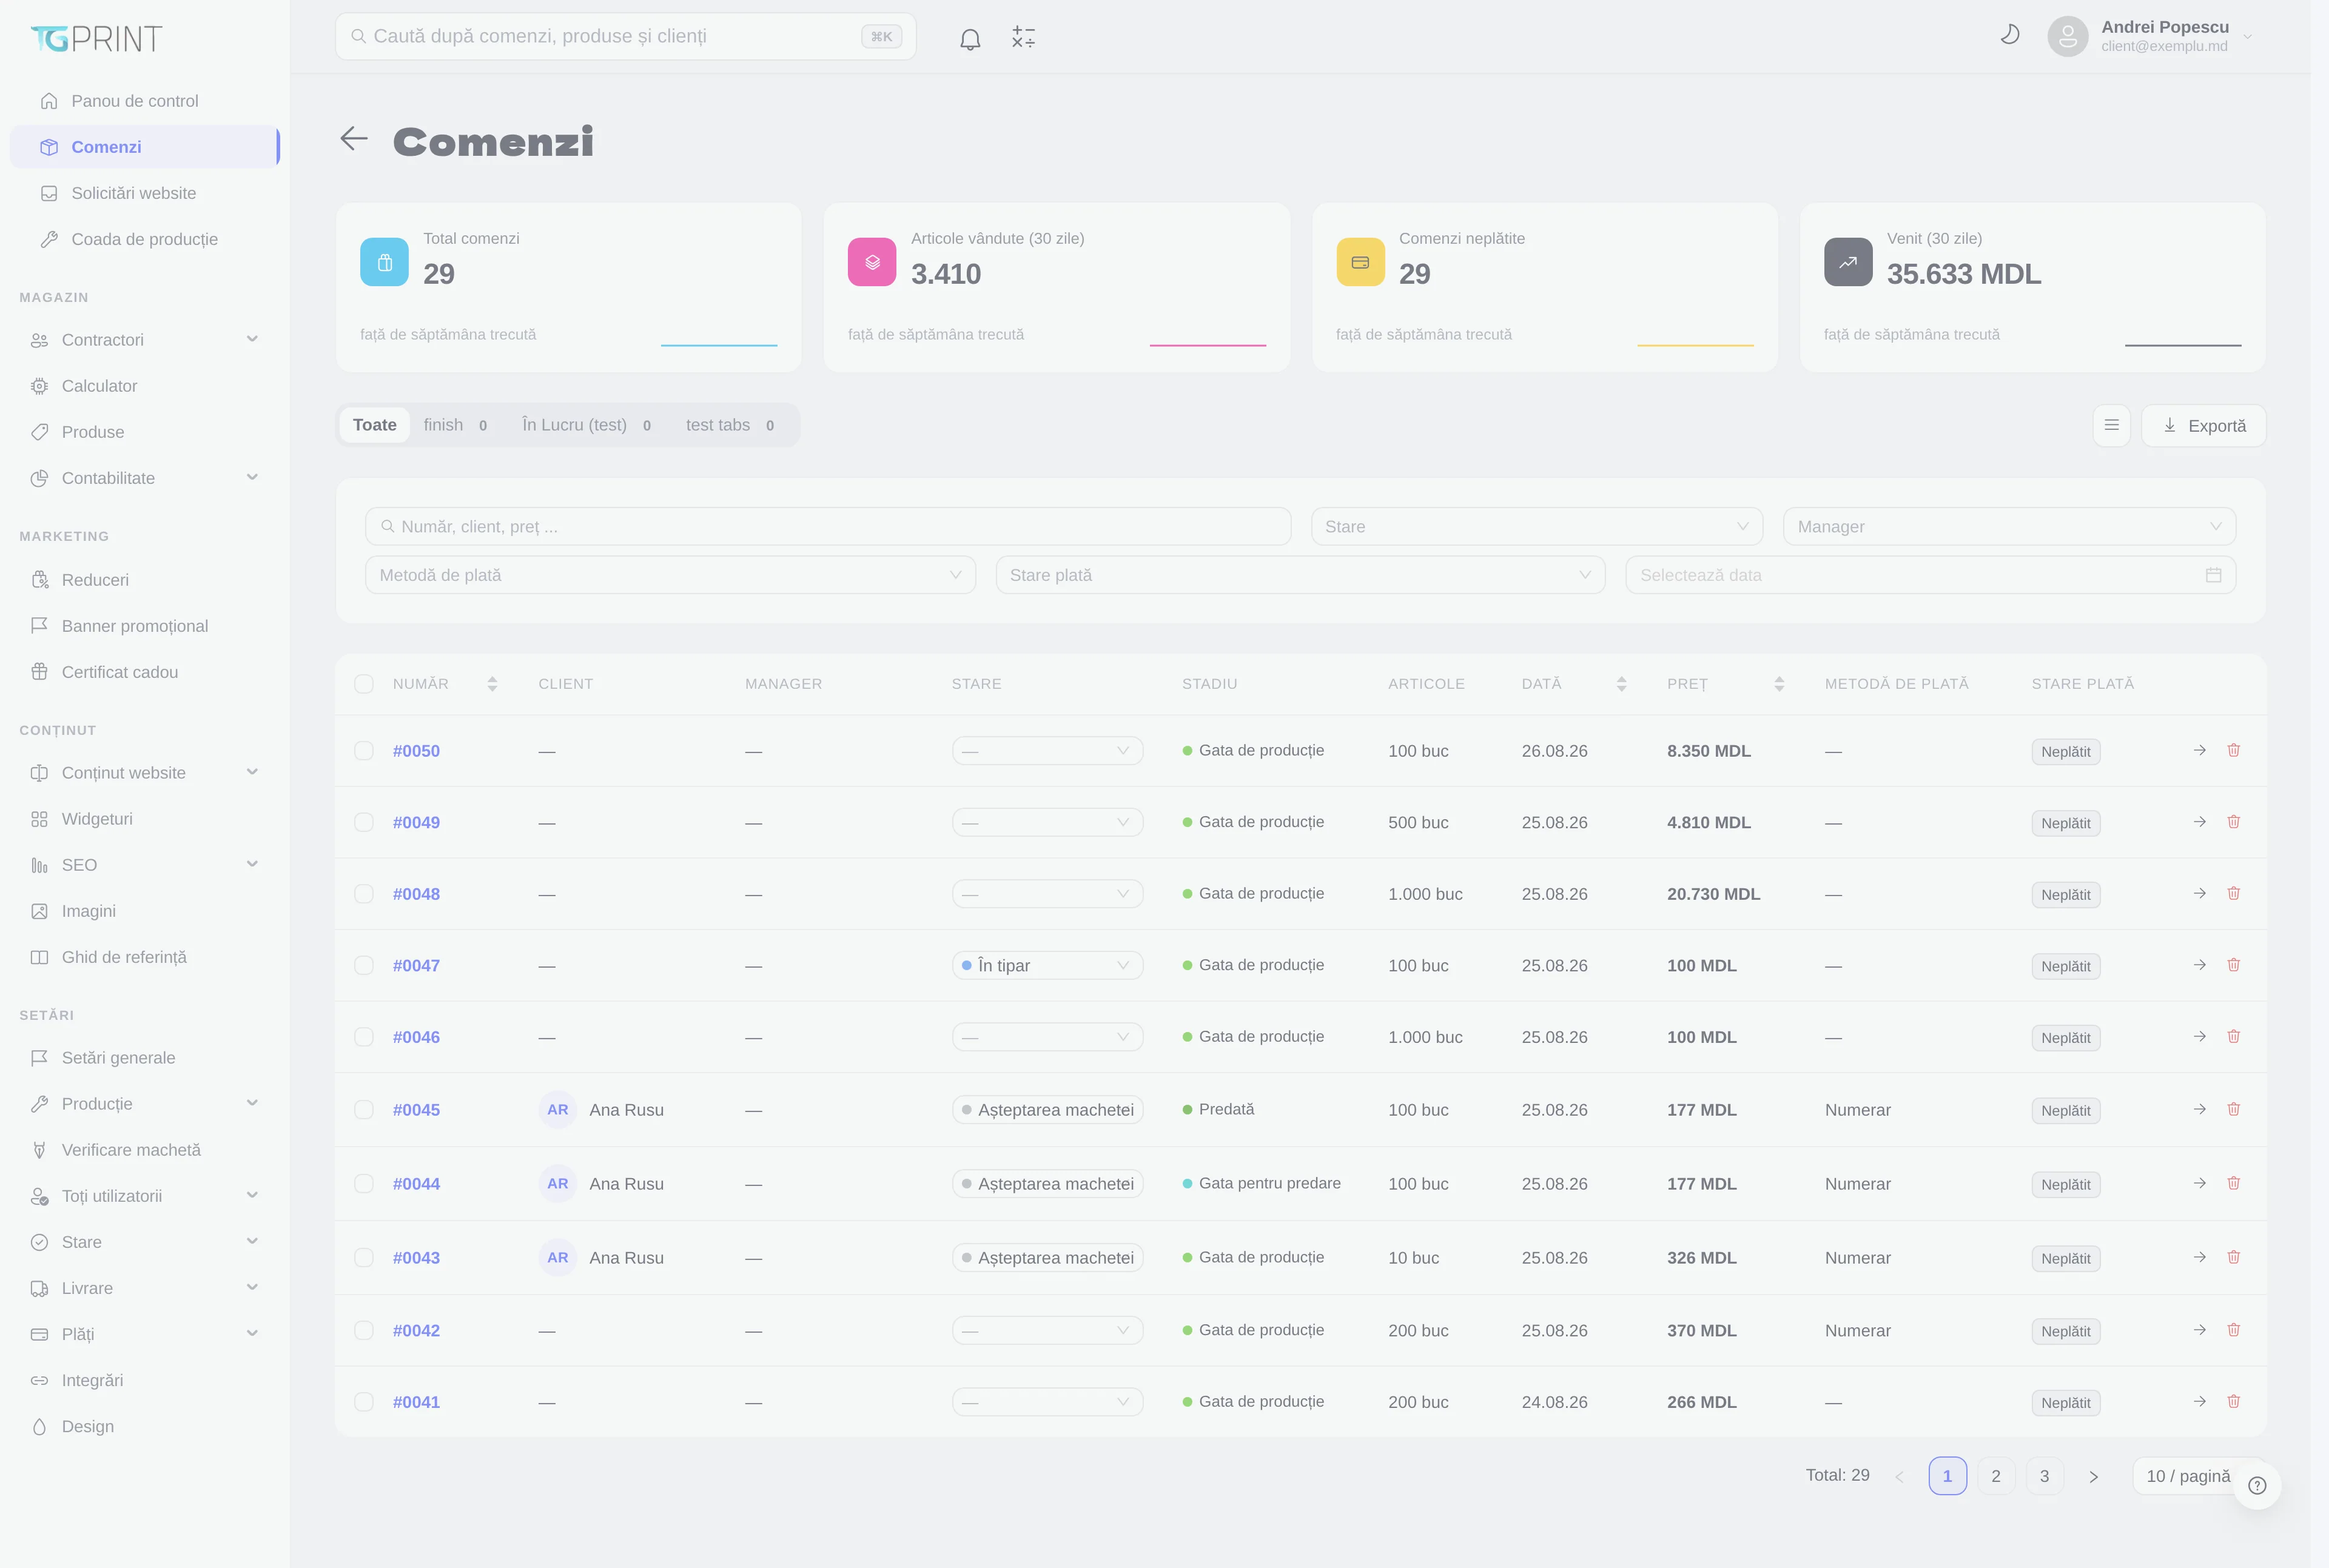
The indicators at the top
The four cards are computed from all the store's orders, each time the page is opened:
- Total orders — how many orders exist in total, since the store started.
- Items sold (30 days) — the pieces from all the order lines placed in the last 30 days.
- Unpaid orders — the orders whose payment status is Unpaid, over the whole history.
- Revenue (30 days) — the sum of the totals of the orders created in the last 30 days, whether they were paid or not and whatever their status.
The line under each figure is the trend over the last 14 days. When there is data for both weeks, the difference in percent vs last week also appears (the last 7 days against the 7 before them).
The status tabs
The row above the table starts with All, followed by the tabs you define in Settings → Status → Orders: there, every order status is tied to a tab through the Orders Tab column. The number next to a tab is how many orders are currently in its statuses. Click a tab and the table shows only the orders in it; the list goes back to the first page.
The filters
The filters in the card below the tabs combine with each other and with the selected tab.
- Type in the Number, client, price ... field and press Enter to search by order number, customer name or value.
- Open Status and pick an order status; All removes the filter. The list is the one from Settings → Status → Orders.
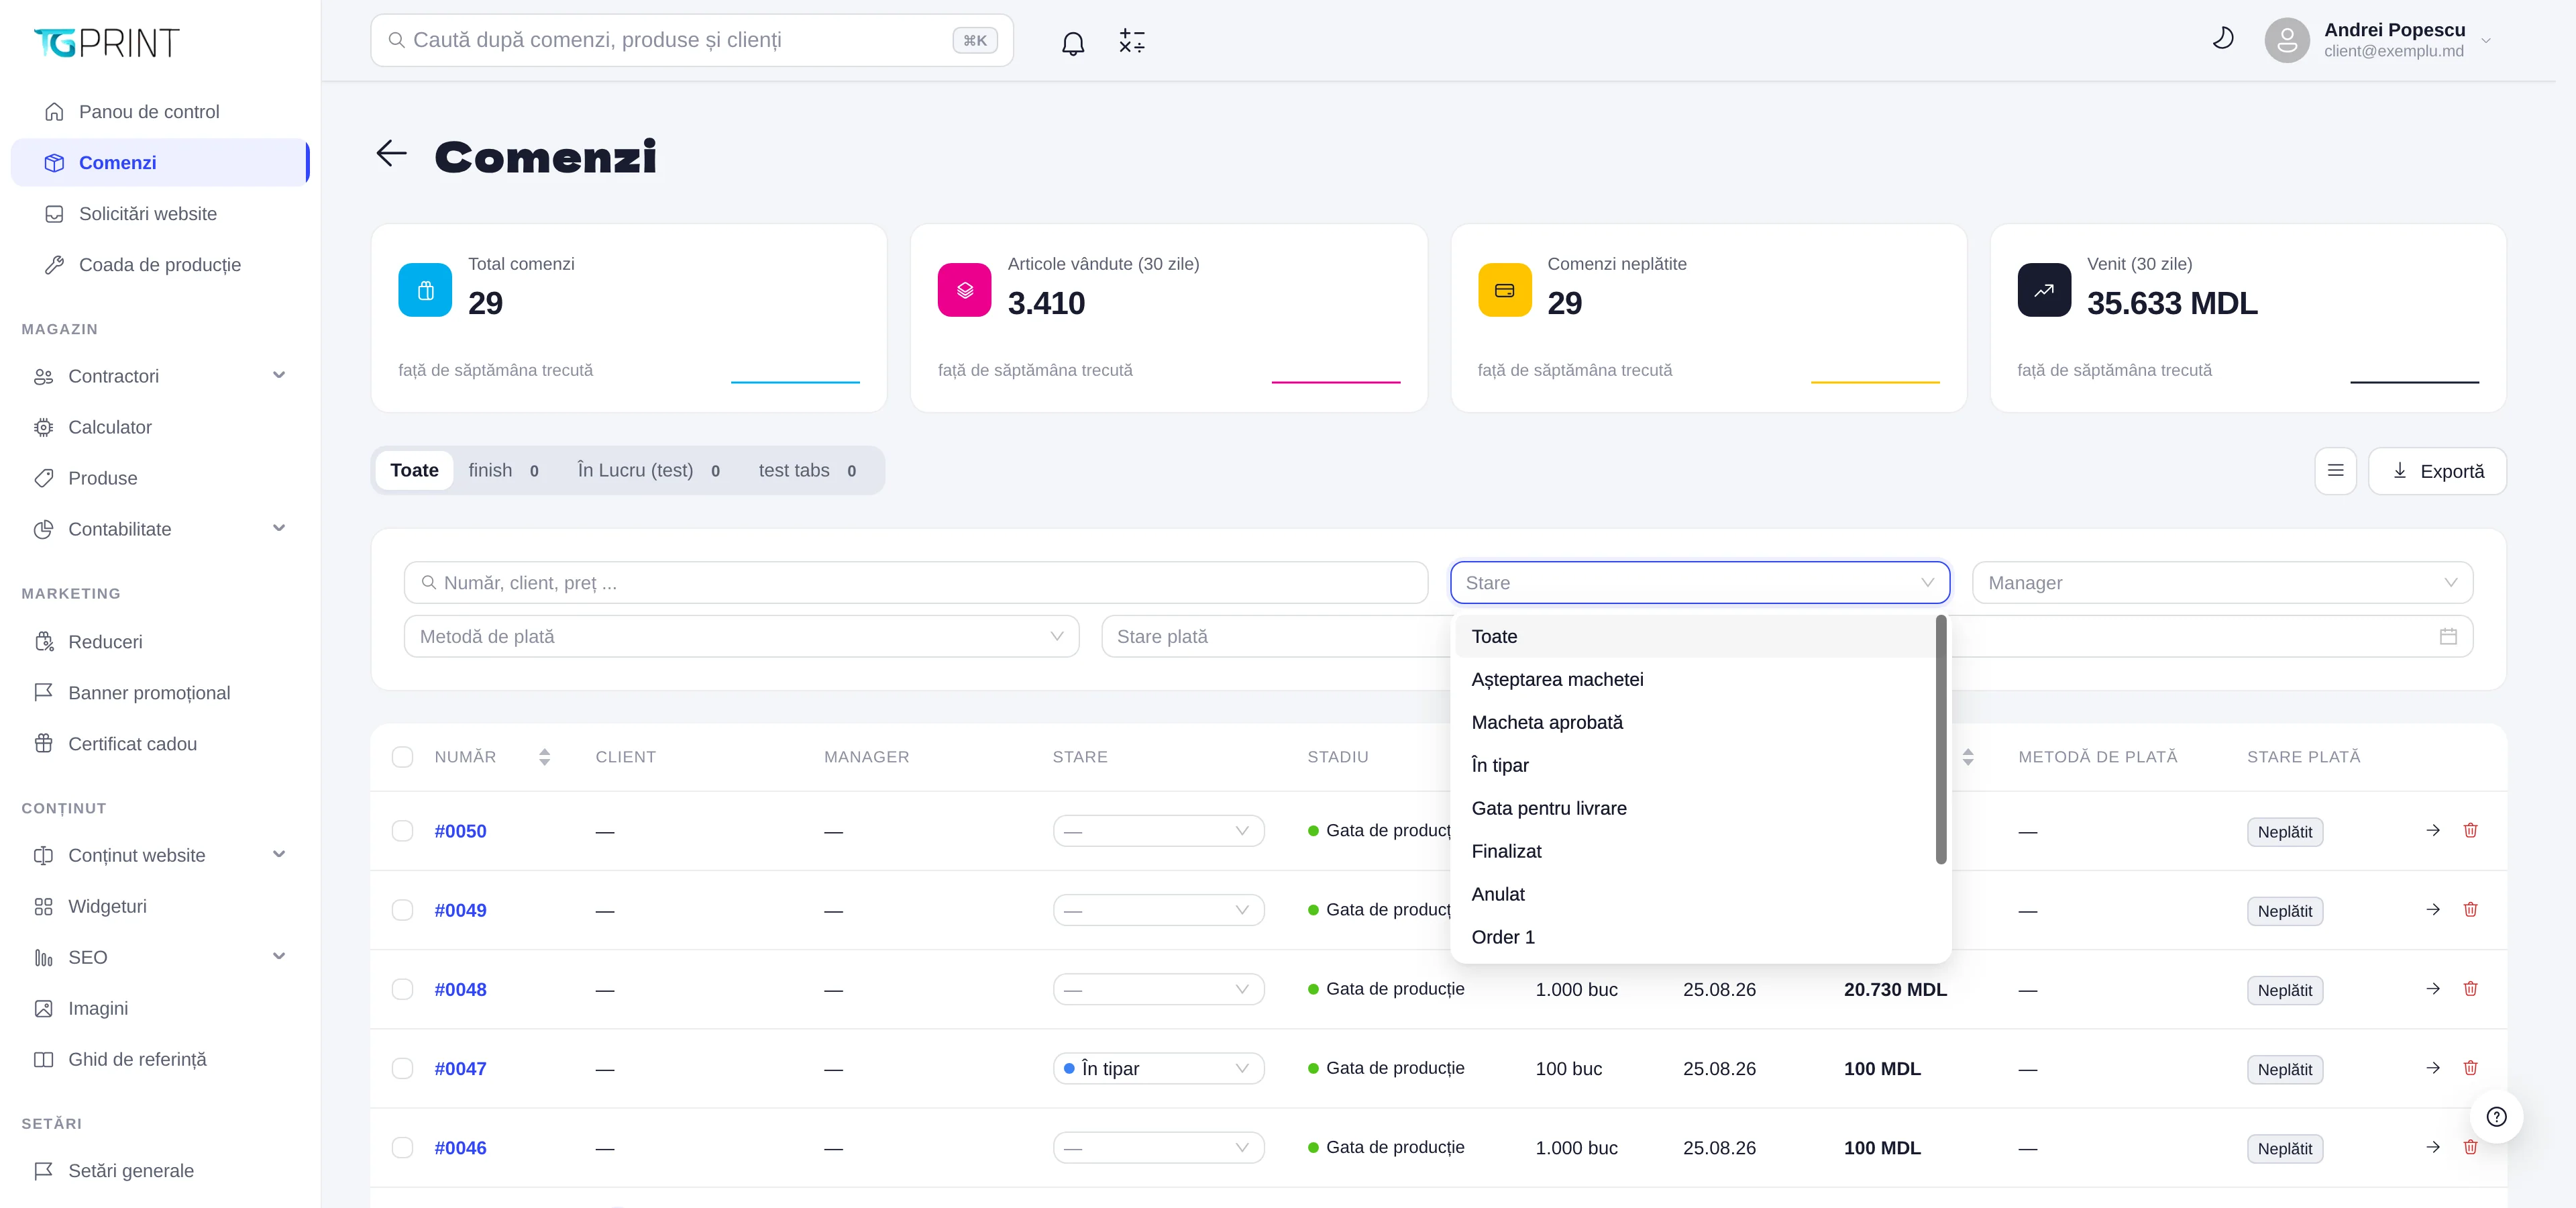
- Manager — a user of the panel; you can type to search the list.
- Payment Method — Cash, Bank transfer, Card, PayPal or Bonus.
- Payment Status — Unpaid, Paid, Partial or Guarantee.
- Select date — a single day: the orders created on the chosen day.
Each filter is cleared with the × next to it.
The table columns
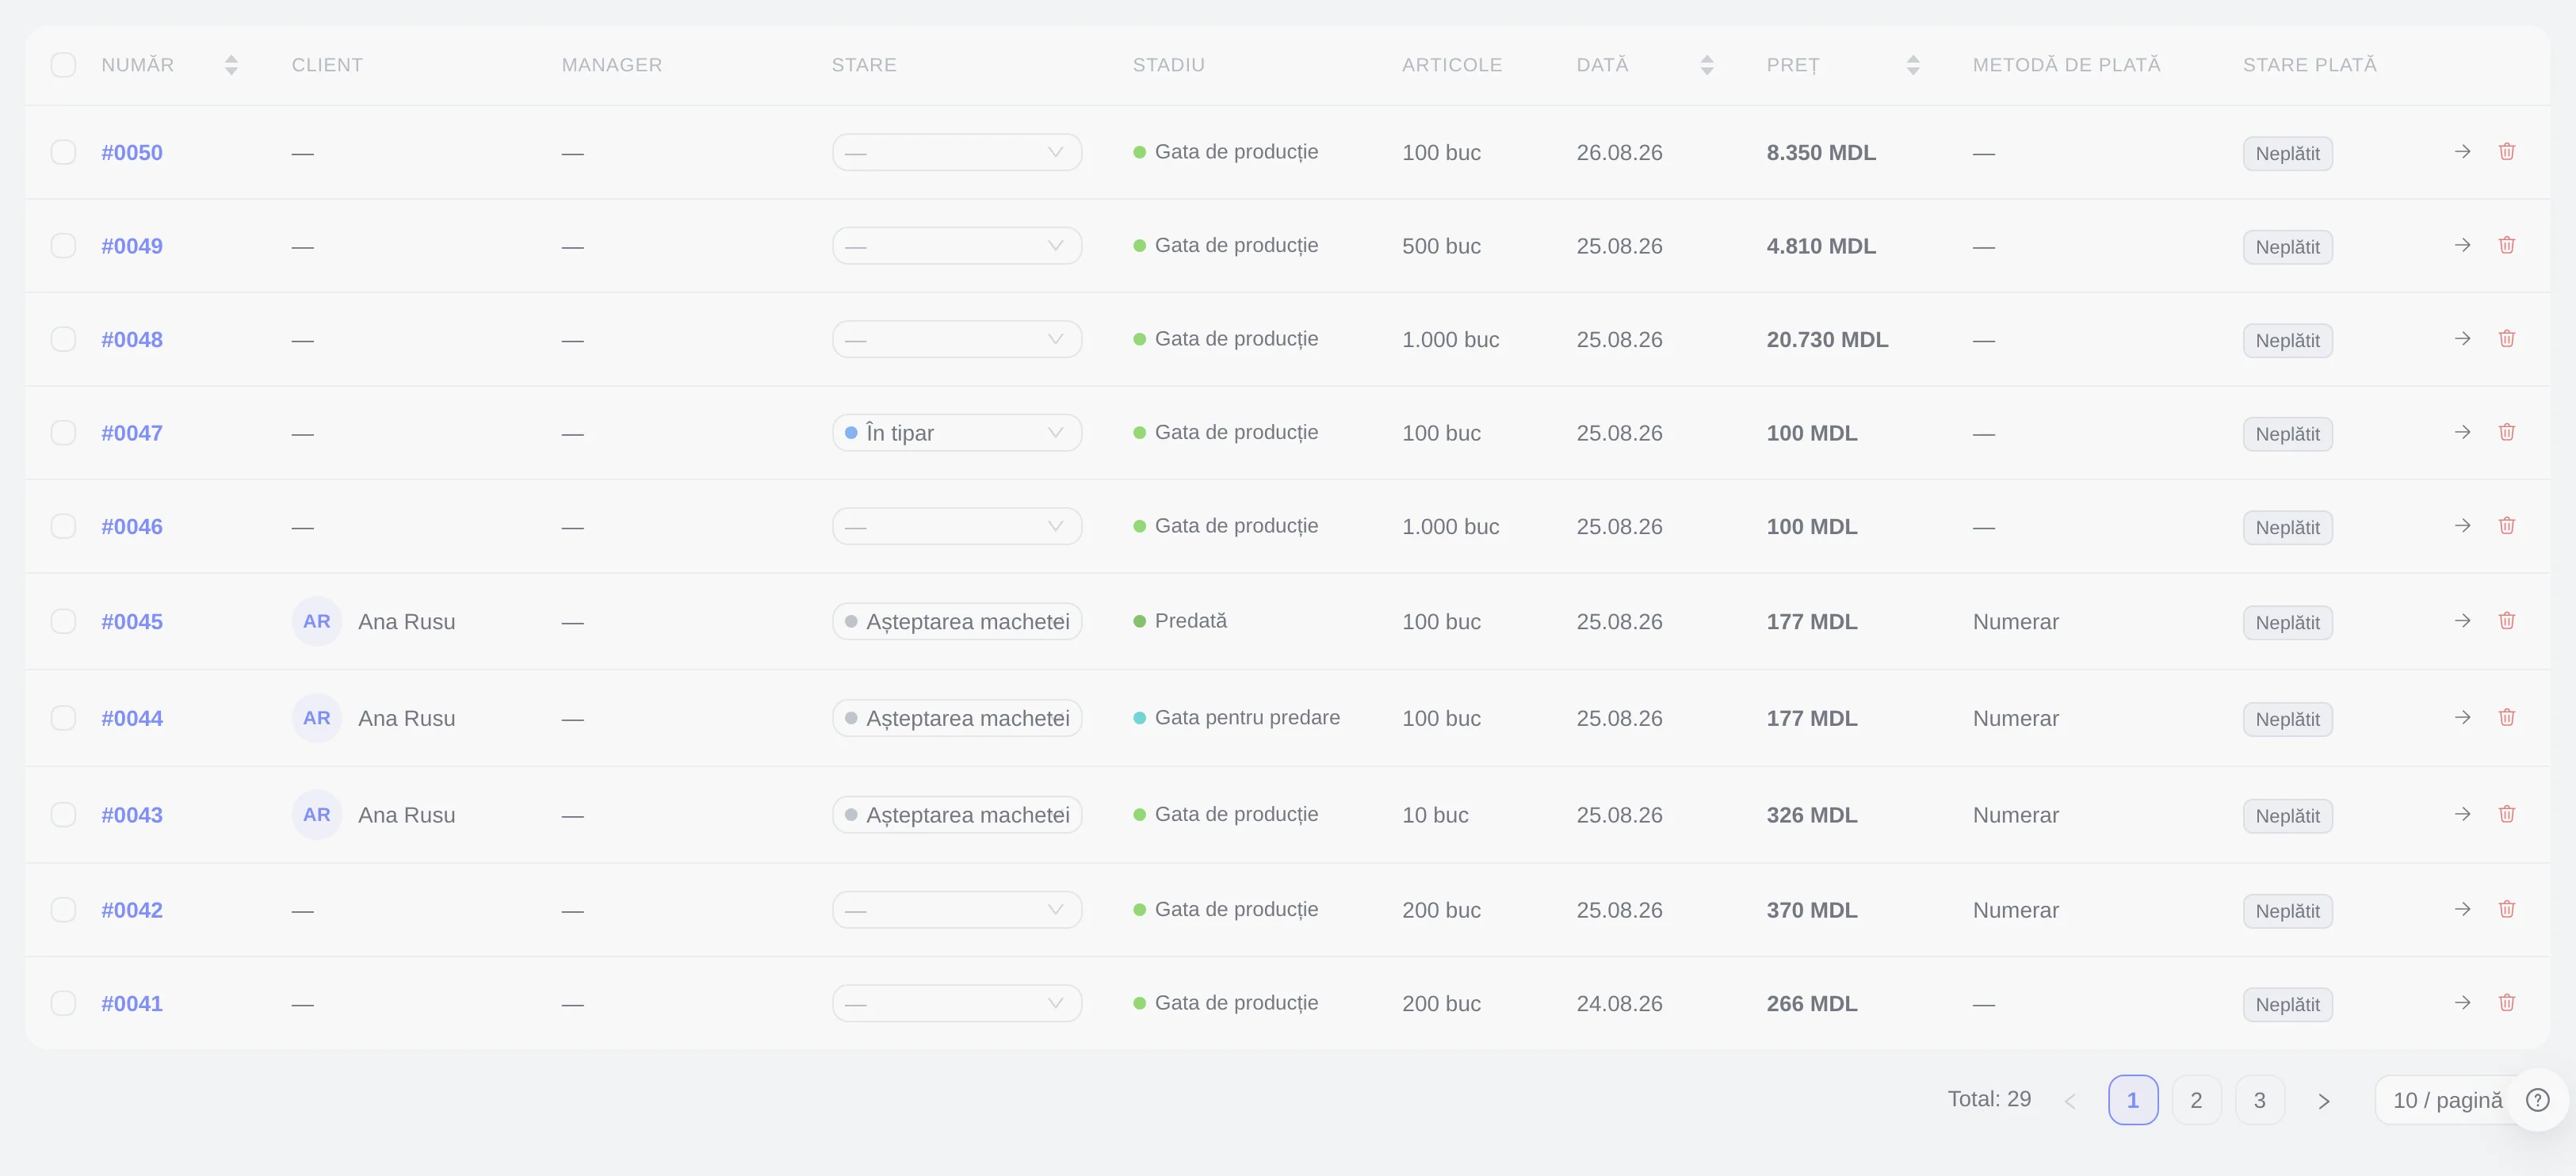
- Number — the order number; it is a link to its page. It can be sorted.
- Client — the customer's initials and name. For an order placed without an account, the name entered at checkout is shown; — means the order has no contact details.
- Manager — the manager in charge, or — if none is assigned.
- Status — the order status, as a dropdown. You can change it straight from here, without opening the order: the choice is written into the order history and, if that status has its notification enabled, the customer receives an email. The confirmation is Status updated.
- Readiness — how far the work has got, computed from the order lines: Awaiting artwork review, Needs correction, Ready for production, In progress, Ready for handover, Handed over or Cancelled. Hover over it to see the detail, for example All artwork accepted (1) or 1 of 1 handed over. The readiness cannot be edited: it changes as artwork is accepted and production stages are ticked off.
- Items — the total number of pieces in the order.
- Date — the creation date; it can be sorted.
- Price — the order total, with the currency; it can be sorted.
- Payment Method and Payment Status — Paid appears with a green label.
- The arrow on the right opens the order; the bin deletes it after you confirm Delete this record?.
Clicking anywhere on the row also opens the order page.
Note. Status and Readiness answer different questions. The status is the label you (or an automatic rule) choose and the one the customer sees; the readiness is the stage the order lines have actually reached. An order can have the status Awaiting artwork and the readiness Handed over if nobody updated the status any further — see Statuses and rules for the automatic transition.
Bulk selection, columns and export
- Tick one or more orders in the first column. A red button with a bin appears above the table; click it and confirm Delete selected records?. The deletion is permanent and requires the order-deletion permission; it is meant for test orders or ones created by mistake. A real order is cancelled from its own page (Actions → Cancel order), so that it stays in the system with all of its history.
- The three-line button to the left of Export opens the list of columns; untick whatever you do not want to see. The column names there are the technical ones, in English. The choice lasts until the page is reloaded.
- Export downloads a CSV file (
orders-AAAA-LL-ZZ.csv) with the orders from the current view — the selected tab and filters apply to the export as well — up to 1,000 rows. The columns are Number, Client, Manager, Status, Date, Price, Payment Method and Payment Status. The file opens correctly in Excel, with diacritics.
Pagination
Below the table you see Total: 29 (the number of orders matching the filters), the pages and the page size — 10 / page by default, with options from 5 to 500.
What you see in the list depends on your role: a manager may only have access to certain statuses. The permissions are set in Users, roles and managers. For a short version of the same list, filtered by status, see Dashboard.