Images and files
The image library (folders, uploading) and the downloadable files of the site.
Updated:
The platform has two file libraries. Content → Images is the image library of the store: this is where products, widgets, banners and blog articles take their pictures from — wherever you see a Select Image button in the panel, the same manager opens, as a window. Content → Website Content → Files holds the downloadable documents (price lists, catalogs, instructions), each published at its own address on the site. All uploaded files are kept in the cloud (Cloudflare R2); the panel keeps track of them.
Images
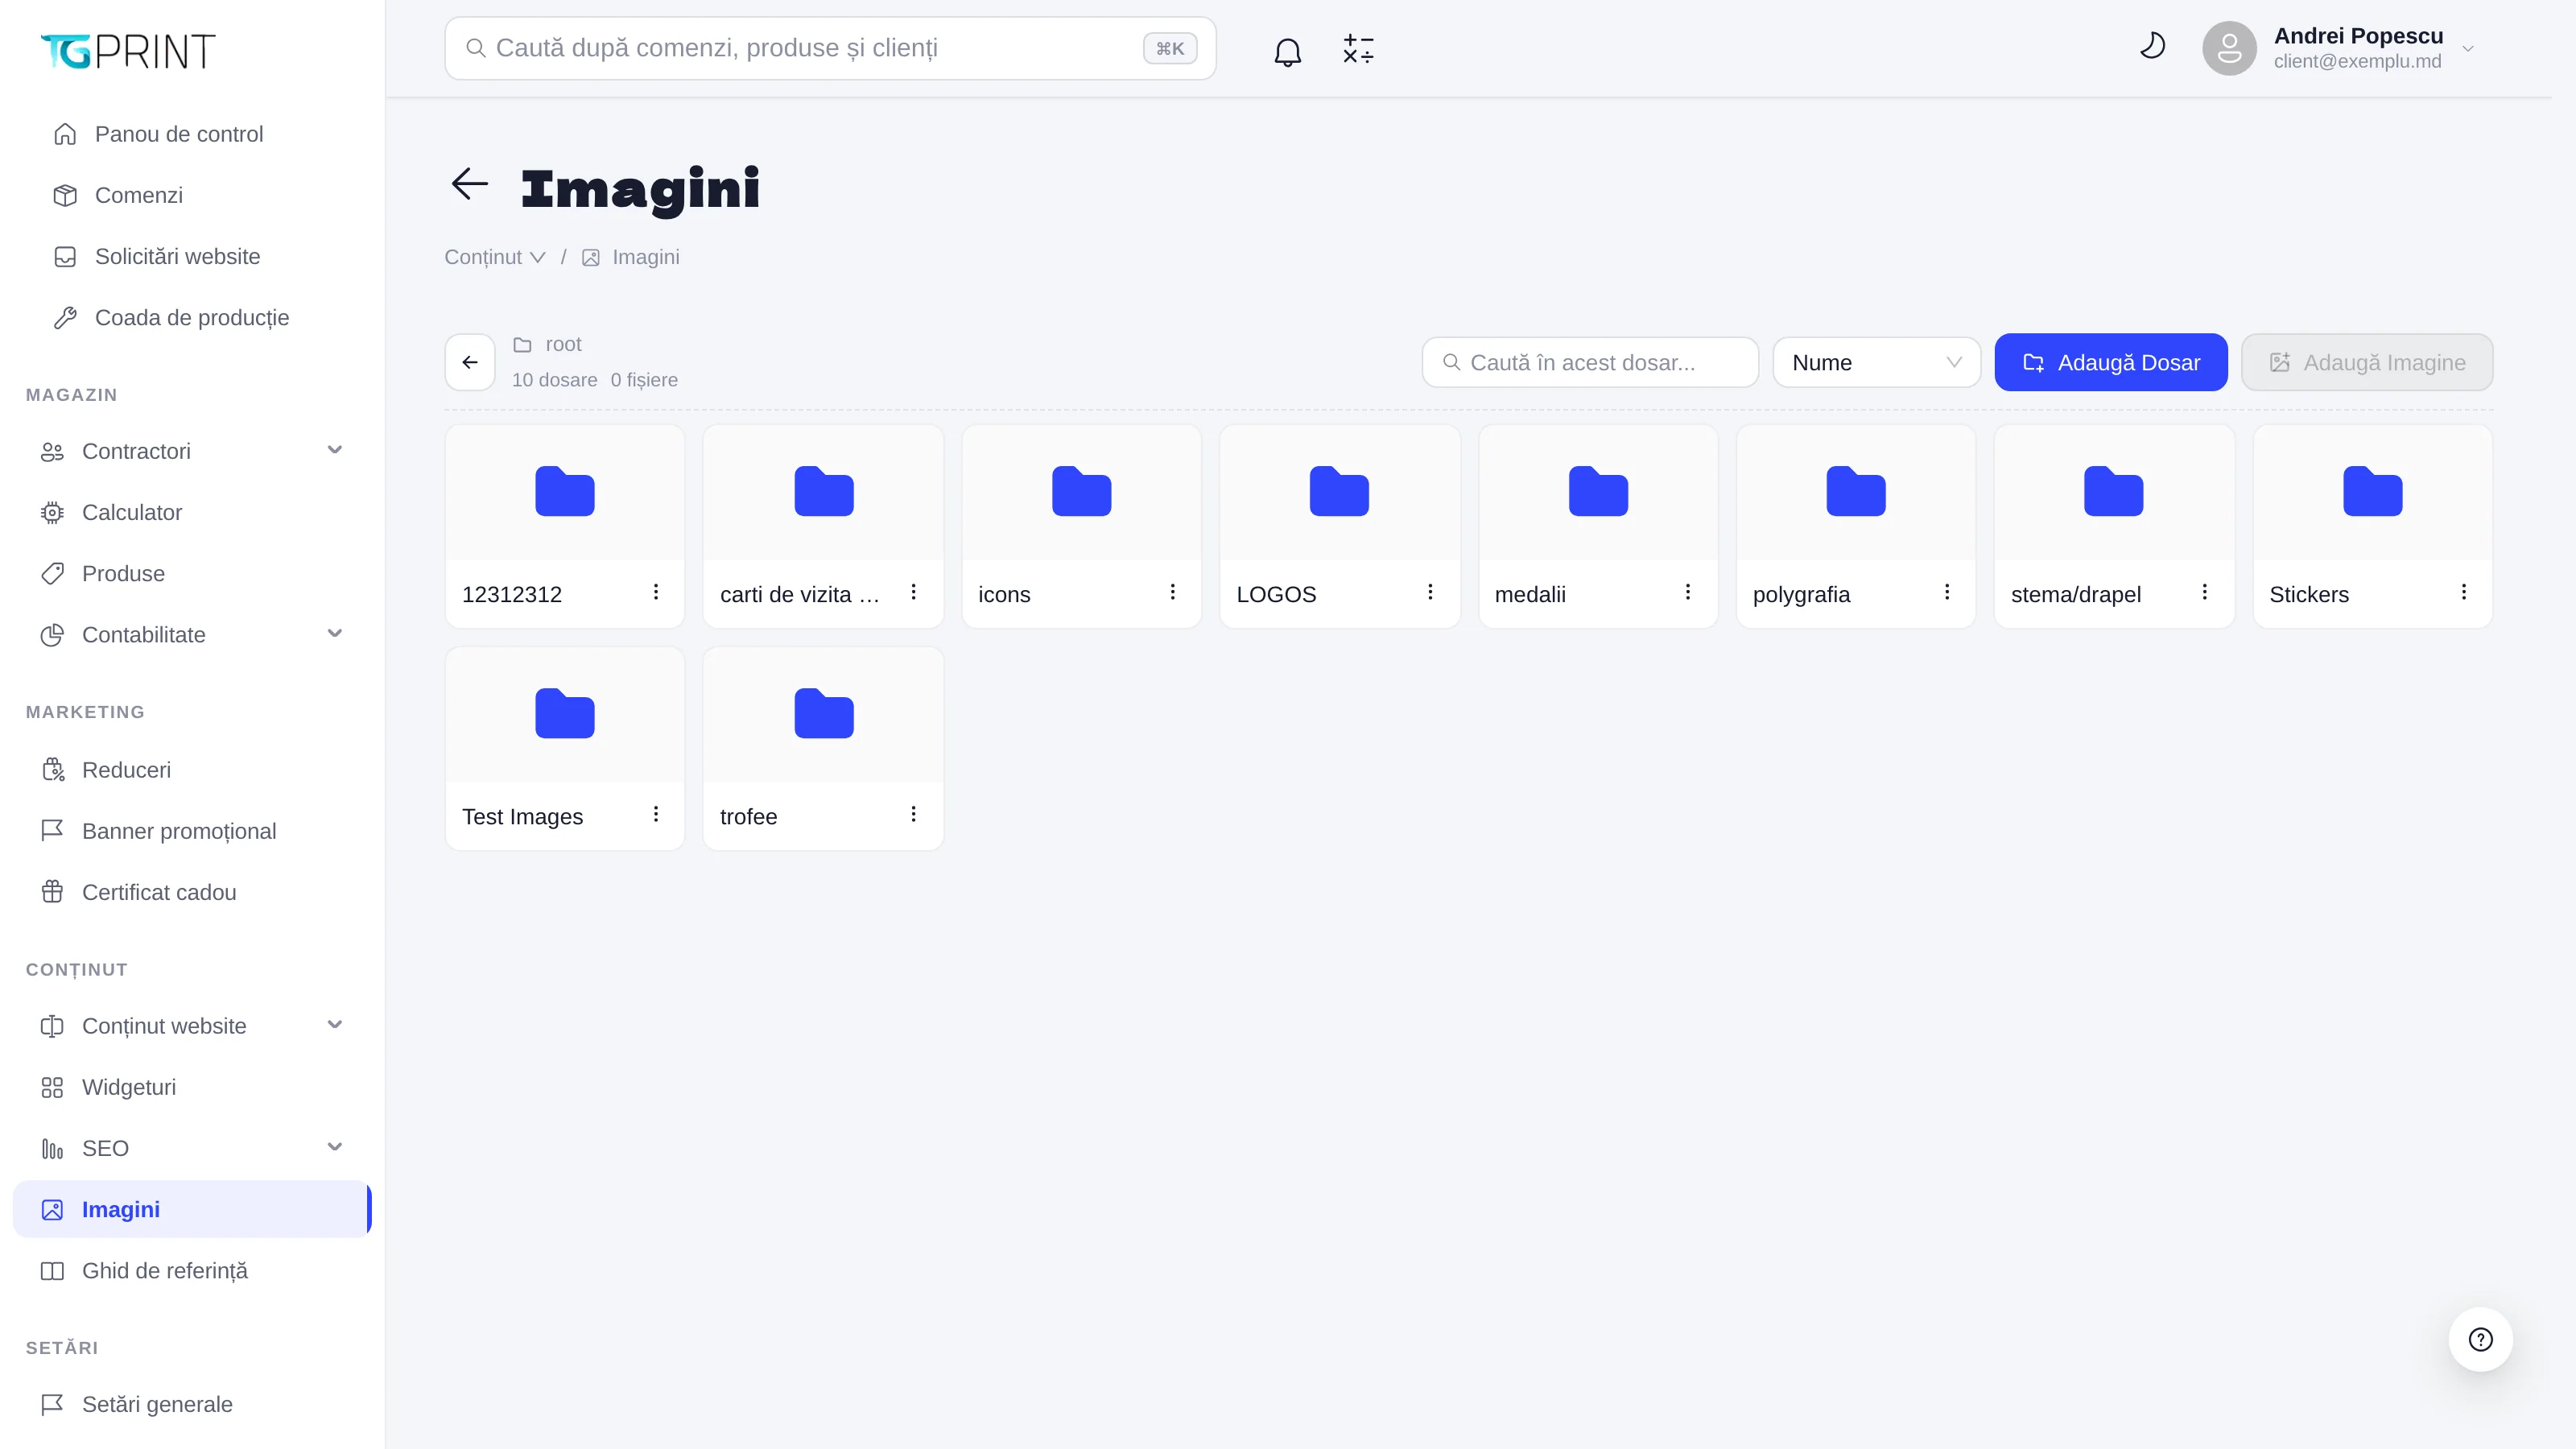
The screen works like a file explorer. At the top you have the back arrow, the path of the current folder (it starts from root) and the number of folders and files in it; on the right, the Search in this folder... field (within the open folder only), the sorting — Name, Newest first, Size — and the Add Folder and Add Image buttons.
Folders and images appear as tiles. A click on a folder opens it; the ⋮ menu of the tile (or a right-click) offers Open folder, Rename folder and Delete — deleting a folder also deletes everything inside it, after confirmation. The tile of an image shows the thumbnail, the dimensions in pixels, the name and the size; its menu has View (a large preview), Copy (opens a copy of the image in the editor, so you can crop or compress it and upload it as a new file) and Delete.
Add Folder asks only for a Name; the folder is created where you currently are, so you can make subfolders too.
Note. Add Image is inactive in root: images are always uploaded into a folder. Create or open a folder first.
Uploading images
- Open the destination folder and click Add Image.
- In the Add Image window, click the Click or drag images here to upload area or drag the files onto it. You can pick several images at once, including SVGs.
- The window splits in two: on the left, the file queue (name, size, the Add more files button, and Remove from list on each file); on the right, the editor of the selected file — Edit image (cropping), Rotate, Flip horizontal / Flip vertical, Compress image with Estimated size, Final image dimensions (Width, Height, Maintain aspect ratio) and the name the file will be saved under.
- Click Apply changes for the file you edited; it gets the Edited label. SVG files do not go through the editor — SVG files are uploaded without editing — cropping would rasterise them.
- Click Upload all (n). The edited files are uploaded in their edited form, the others as they are; the ones that fail stay in the queue with an error mark, so you can retry.
Files
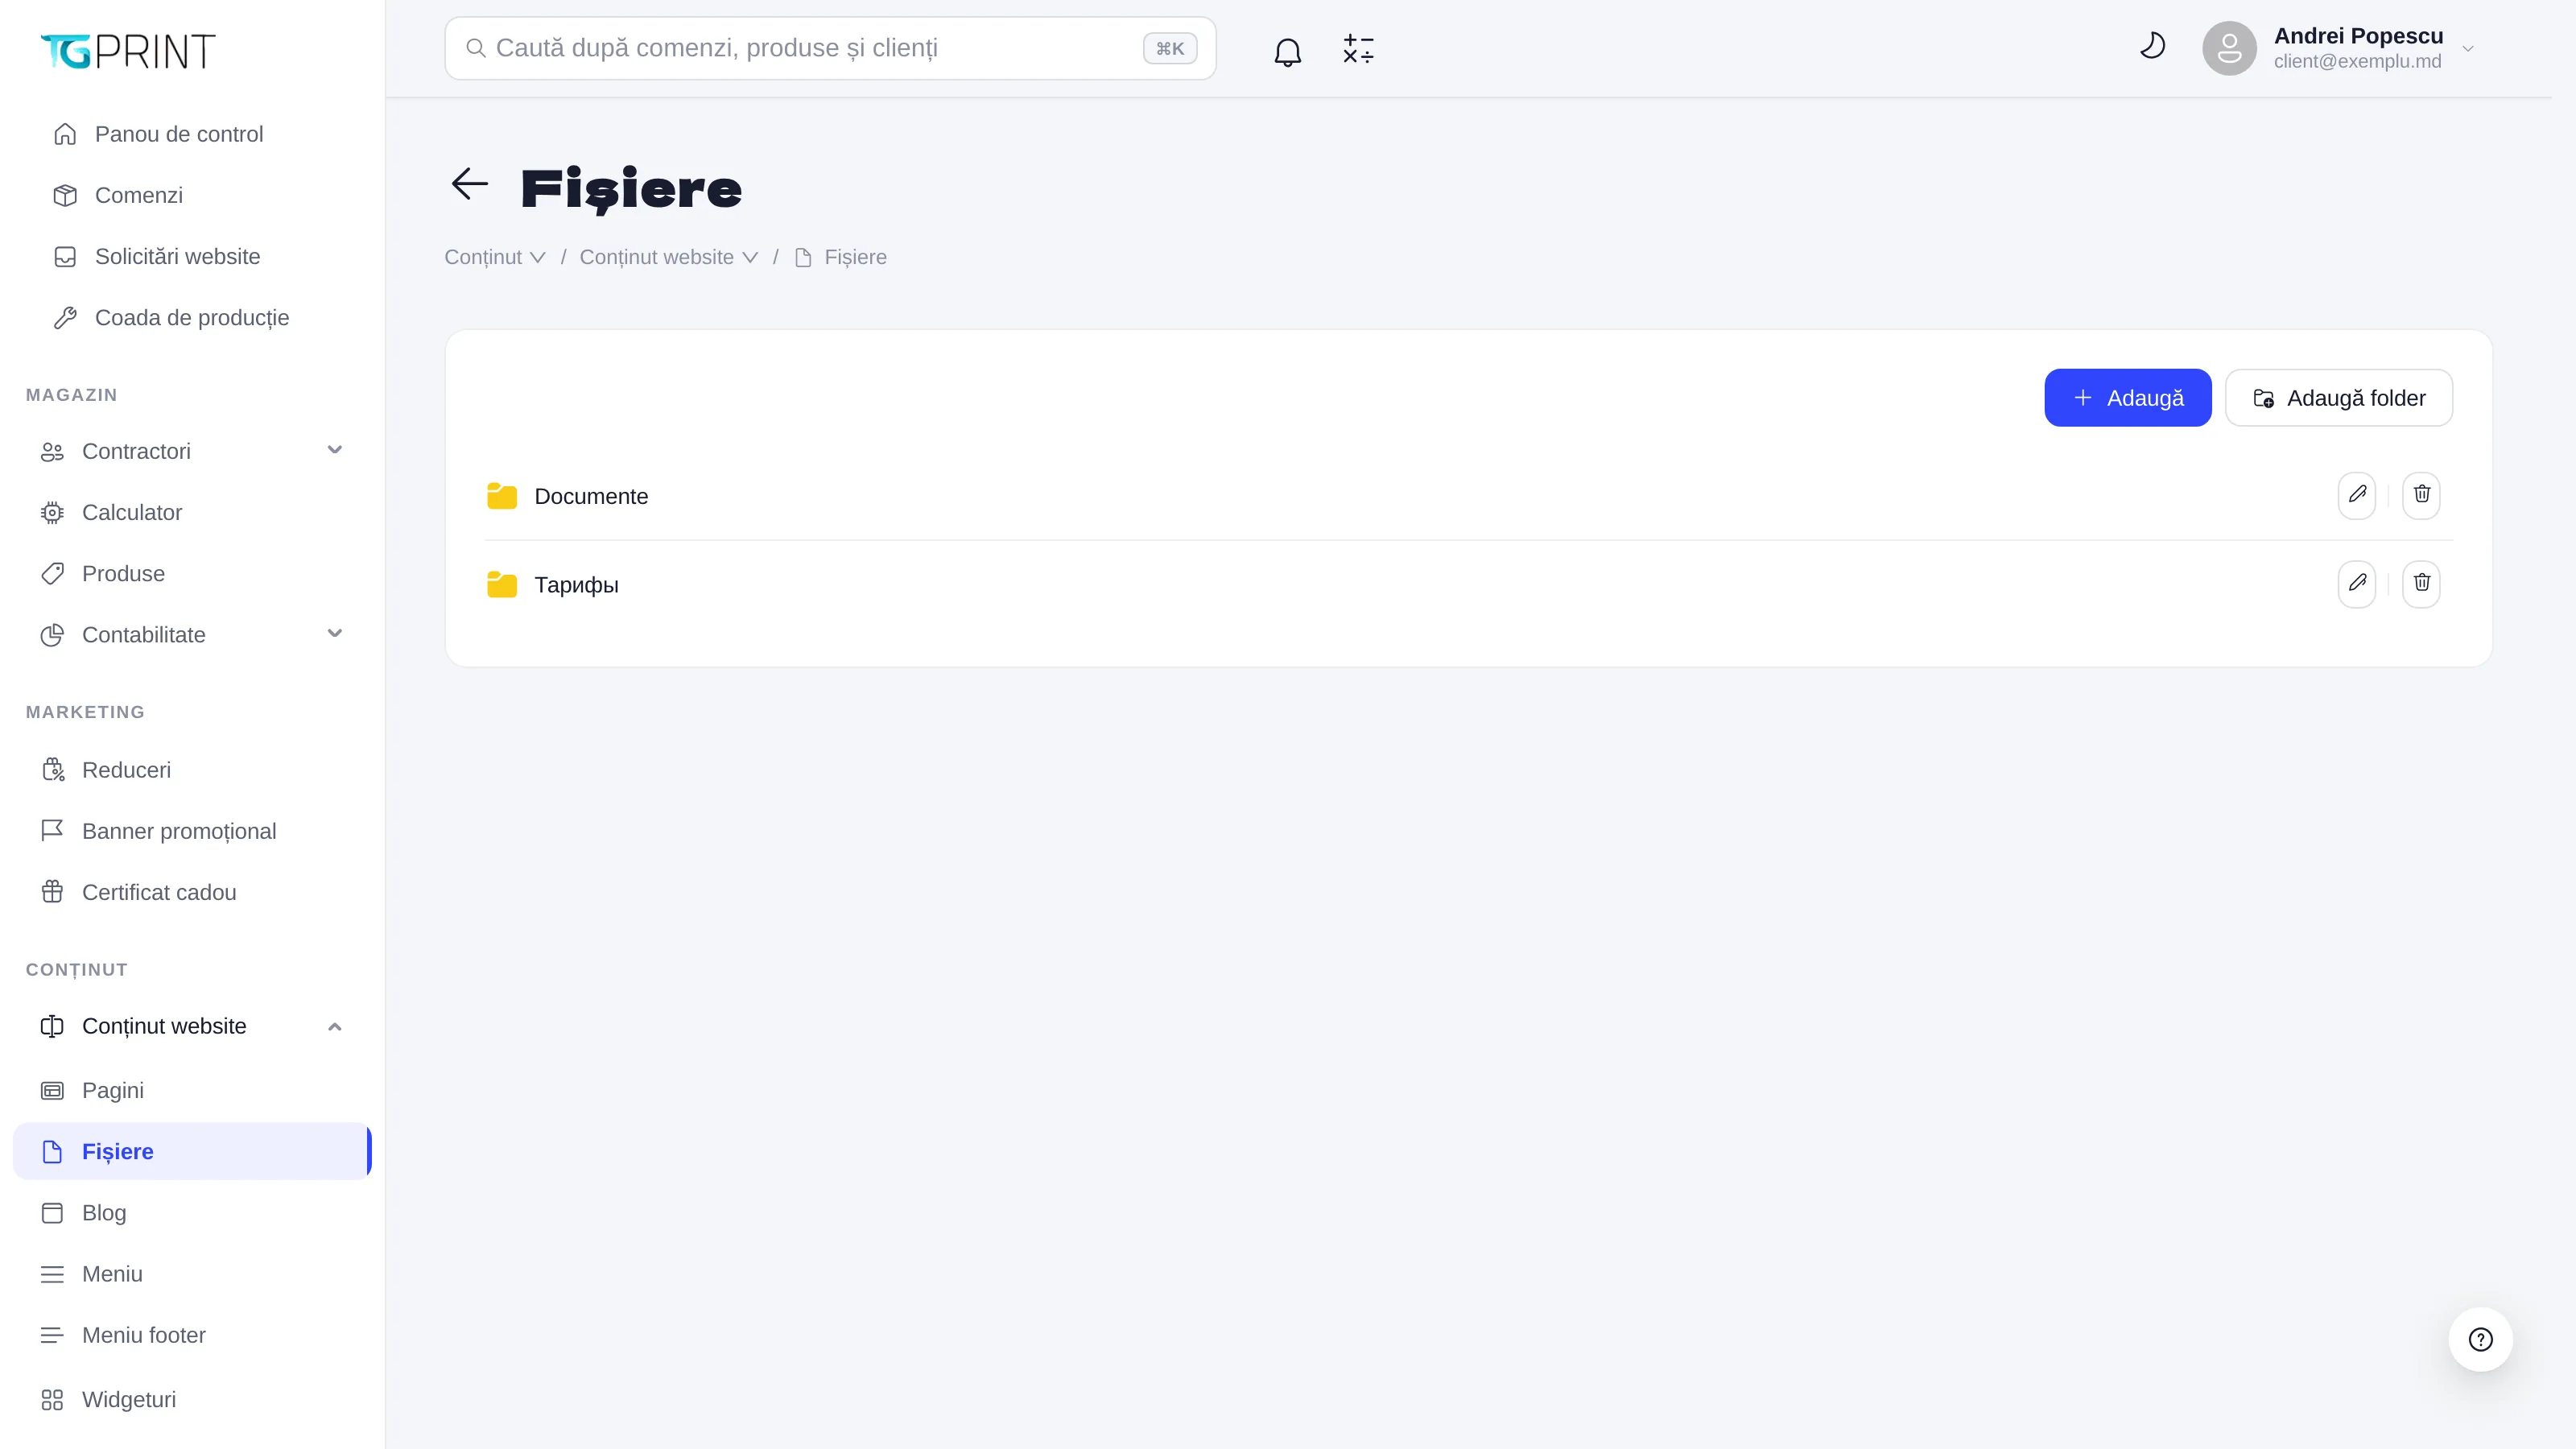
Files is a simple list: folders (yellow) and, under them, files. The folders have a single level — Add Folder appears only at the root and asks for a Folder name; the pencil renames it, the bin deletes it with everything it contains (Delete this folder and all its files?). Click the name of the folder to enter it; the arrow link above the list takes you back.
A file appears with its original name and, underneath, its public address /files/<url>. On the right: the activation toggle (a deactivated file can no longer be opened from the site, but it stays in the panel), the Open file on site eye and the bin. Click the name to edit it.
- Click Add (from the folder you want the file in) — Add File opens.
- File — pick a single file from your computer; its size appears next to it.
- Url — the final part of the address, filled in automatically from the file name; it may contain only lowercase letters, digits and hyphens, at most 100 characters. If the address is already taken, it automatically gets a numeric suffix.
- Folder — the destination folder or (root).
- Click Save. The file becomes available at
/files/<url>on the site, and you can put the link on pages, in the menu or in the footer.
In Edit File you change Url and Folder or replace the file itself: the Current: row shows the current file, and File picks the new one, which replaces it on save; the address stays the same.